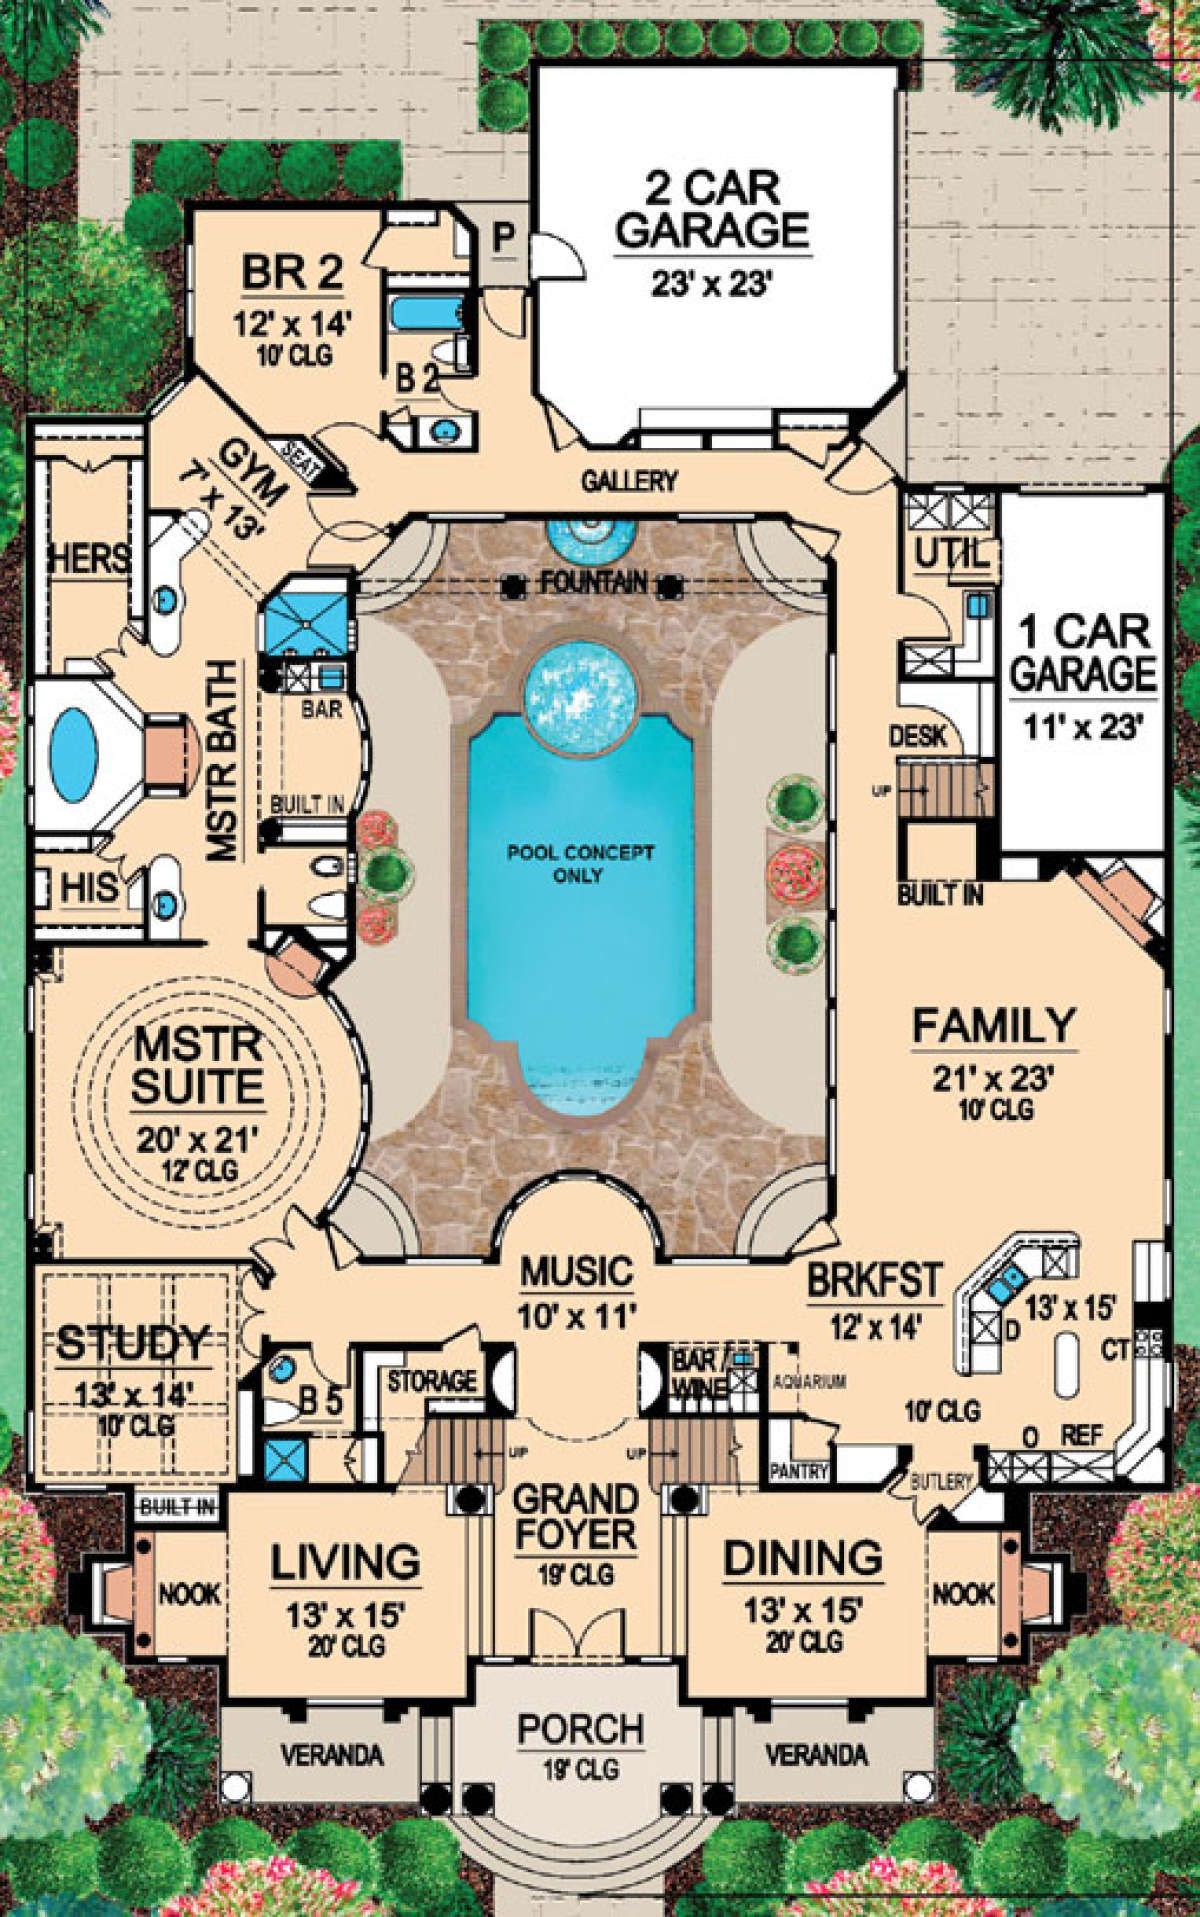
📰 Today’s Build Bulletin: Luxury Backyard Ensemble

1. Cabana Foundation & Footing
Headline: “Cabana Pad Poured!”
Step-by-Step:
-
Site Layout: Stake out the 22′×24′ cabana footprint and utility trench lines.
-
Footing Excavation: Dig footings to engineer’s depth; compact subgrade.
-
Formwork & Rebar: Build wood forms, place #4 rebar cages.
-
Concrete Pour & Cure: Pump high-strength mix; cover and mist for 5–7 days.
2. Patio & Walkway Base
Headline: “Stone Stage Prepped!”
Step-by-Step:
-
Grading & Drainage: Level patio area; slope 1/8″ per foot away from house.
-
Base Layer: Install compacted gravel and sand bedding.
-
Edge Restraints: Set perimeter forms or edging stones.
-
Pre-Paver Survey: Snap chalk lines for pattern guidance.
3. Family Room Wing Framing
Headline: “Indoor-Outdoor Living Framed!”
Step-by-Step:
-
Sill Plates Anchored: Bolt treated plates to existing foundation wall.
-
Wall Studding: Erect 2×6 exterior studs for the 23′×34′ family room.
-
Roof Trusses: Crane in and secure prefab trusses.
-
Sheathing & Wrap: Apply OSB or ZIP panels; tape seams.
4. Breakfast Nook & Kitchen Extension
Headline: “Breakfast Bay Built-Out!”
Step-by-Step:
-
Cantilever Joists: Extend floor framing for the curved 17′×23′ nook.
-
Window Wells: Frame large picture windows for water views.
-
Decking & Subfloor: Install plywood; seal joints against moisture.
-
Rough-In MEP: Stub electrical and lighting, plus plumbing for future wet bar.
5. Pool Shell & Plumbing
Headline: “Gunite Walls Go Up!”
Step-by-Step:
-
Rebar Matrix: Lay steel reinforcement per engineer’s grid.
-
PVC Lines: Rough-in skimmers, main drains, returns, and spa jets.
-
Shotcrete Application: Spray concrete walls; trowel to smooth finish.
-
Curing Method: Cover with wet burlap; keep moist for 7 days.
6. Pool Deck Paver Install
Headline: “Pavers Lock In Place!”
Step-by-Step:
-
Sand Bedding Prep: Screed sand layer over compacted base.
-
Pattern Laying: Set pavers in running bond around the fountain.
-
Joint Sand Sweep: Fill gaps with polymeric sand; mist to activate.
-
Edge Sealing: Apply sealant to protect against staining.
7. Cabana Framing & Roof
Headline: “Cabana Walls & Trusses!”
Step-by-Step:
-
Post & Beam Erection: Install pressure-treated posts on footings.
-
Floor Framing: Lay joists and subfloor sheets.
-
Wall Assembly: Frame 12′ walls; sheathe with exterior-grade panels.
-
Roof Decking: Nail plywood, then underlayment for metal or shingle finish.
8. Interior Fit-Out & Finishes
Headline: “From Drywall to Décor!”
Step-by-Step:
-
Insulation & Sheetrock: Fill walls, hang, tape, and skim drywall.
-
Millwork & Built-Ins: Install bar, wine rack, and storage in cabana.
-
Flooring & Paint: Lay tile or waterproof LVT; apply two-tone paint.
-
Fixture Mounting: Hang light fixtures, mount bar sink, and HVAC diffusers.
9. Final Systems & Landscaping
Headline: “Oasis Activated!”
Step-by-Step:
-
Pool Startup: Connect pump, filter, heater, and LED lights; balance water.
-
Cabana HVAC: Install mini-split system and test zones.
-
Planting & Turf: Lay sod, plant palms, and add potted greenery.
-
Punch List Walk-Through: Tackle touch-ups, inspect roofing, seal plumbing, and sign off.
🔗 Don’t miss the full, step-by-step photo guide and material breakdown in the comments—your complete blueprint for building the perfect poolside retreat!