In this on-site exclusive, we take you step by step through the installation of a rainscreen siding system—complete with moisture-venting furring, drip caps and self-adhering flashing—that ensures cladding looks great and stands up to decades of weather.
1. Preparing the Sheathed Wall
Under a brisk autumn sky, the crew inspects the exterior sheathing, confirming the wrap of weather-resistive barrier (e.g., Tyvek) is smooth and fully taped at seams. All fastener heads are driven flush, creating a flat plane for the furring system. At window and door openings, rough-in inspections verify that flashing and airing provisions are in place.
2. Installing Vertical Furring Strips for Rainscreen
Workers select straight 1″×2″ pine furring strips, cut to wall height. Starting at one corner, the first furring is fastened through the house-wrap into the studs. Fasteners are placed at roughly 16″ on-center to match stud spacing. These vertical strips establish a ¾″ to 1″ air gap behind the siding—crucial for moisture drainage and drying.
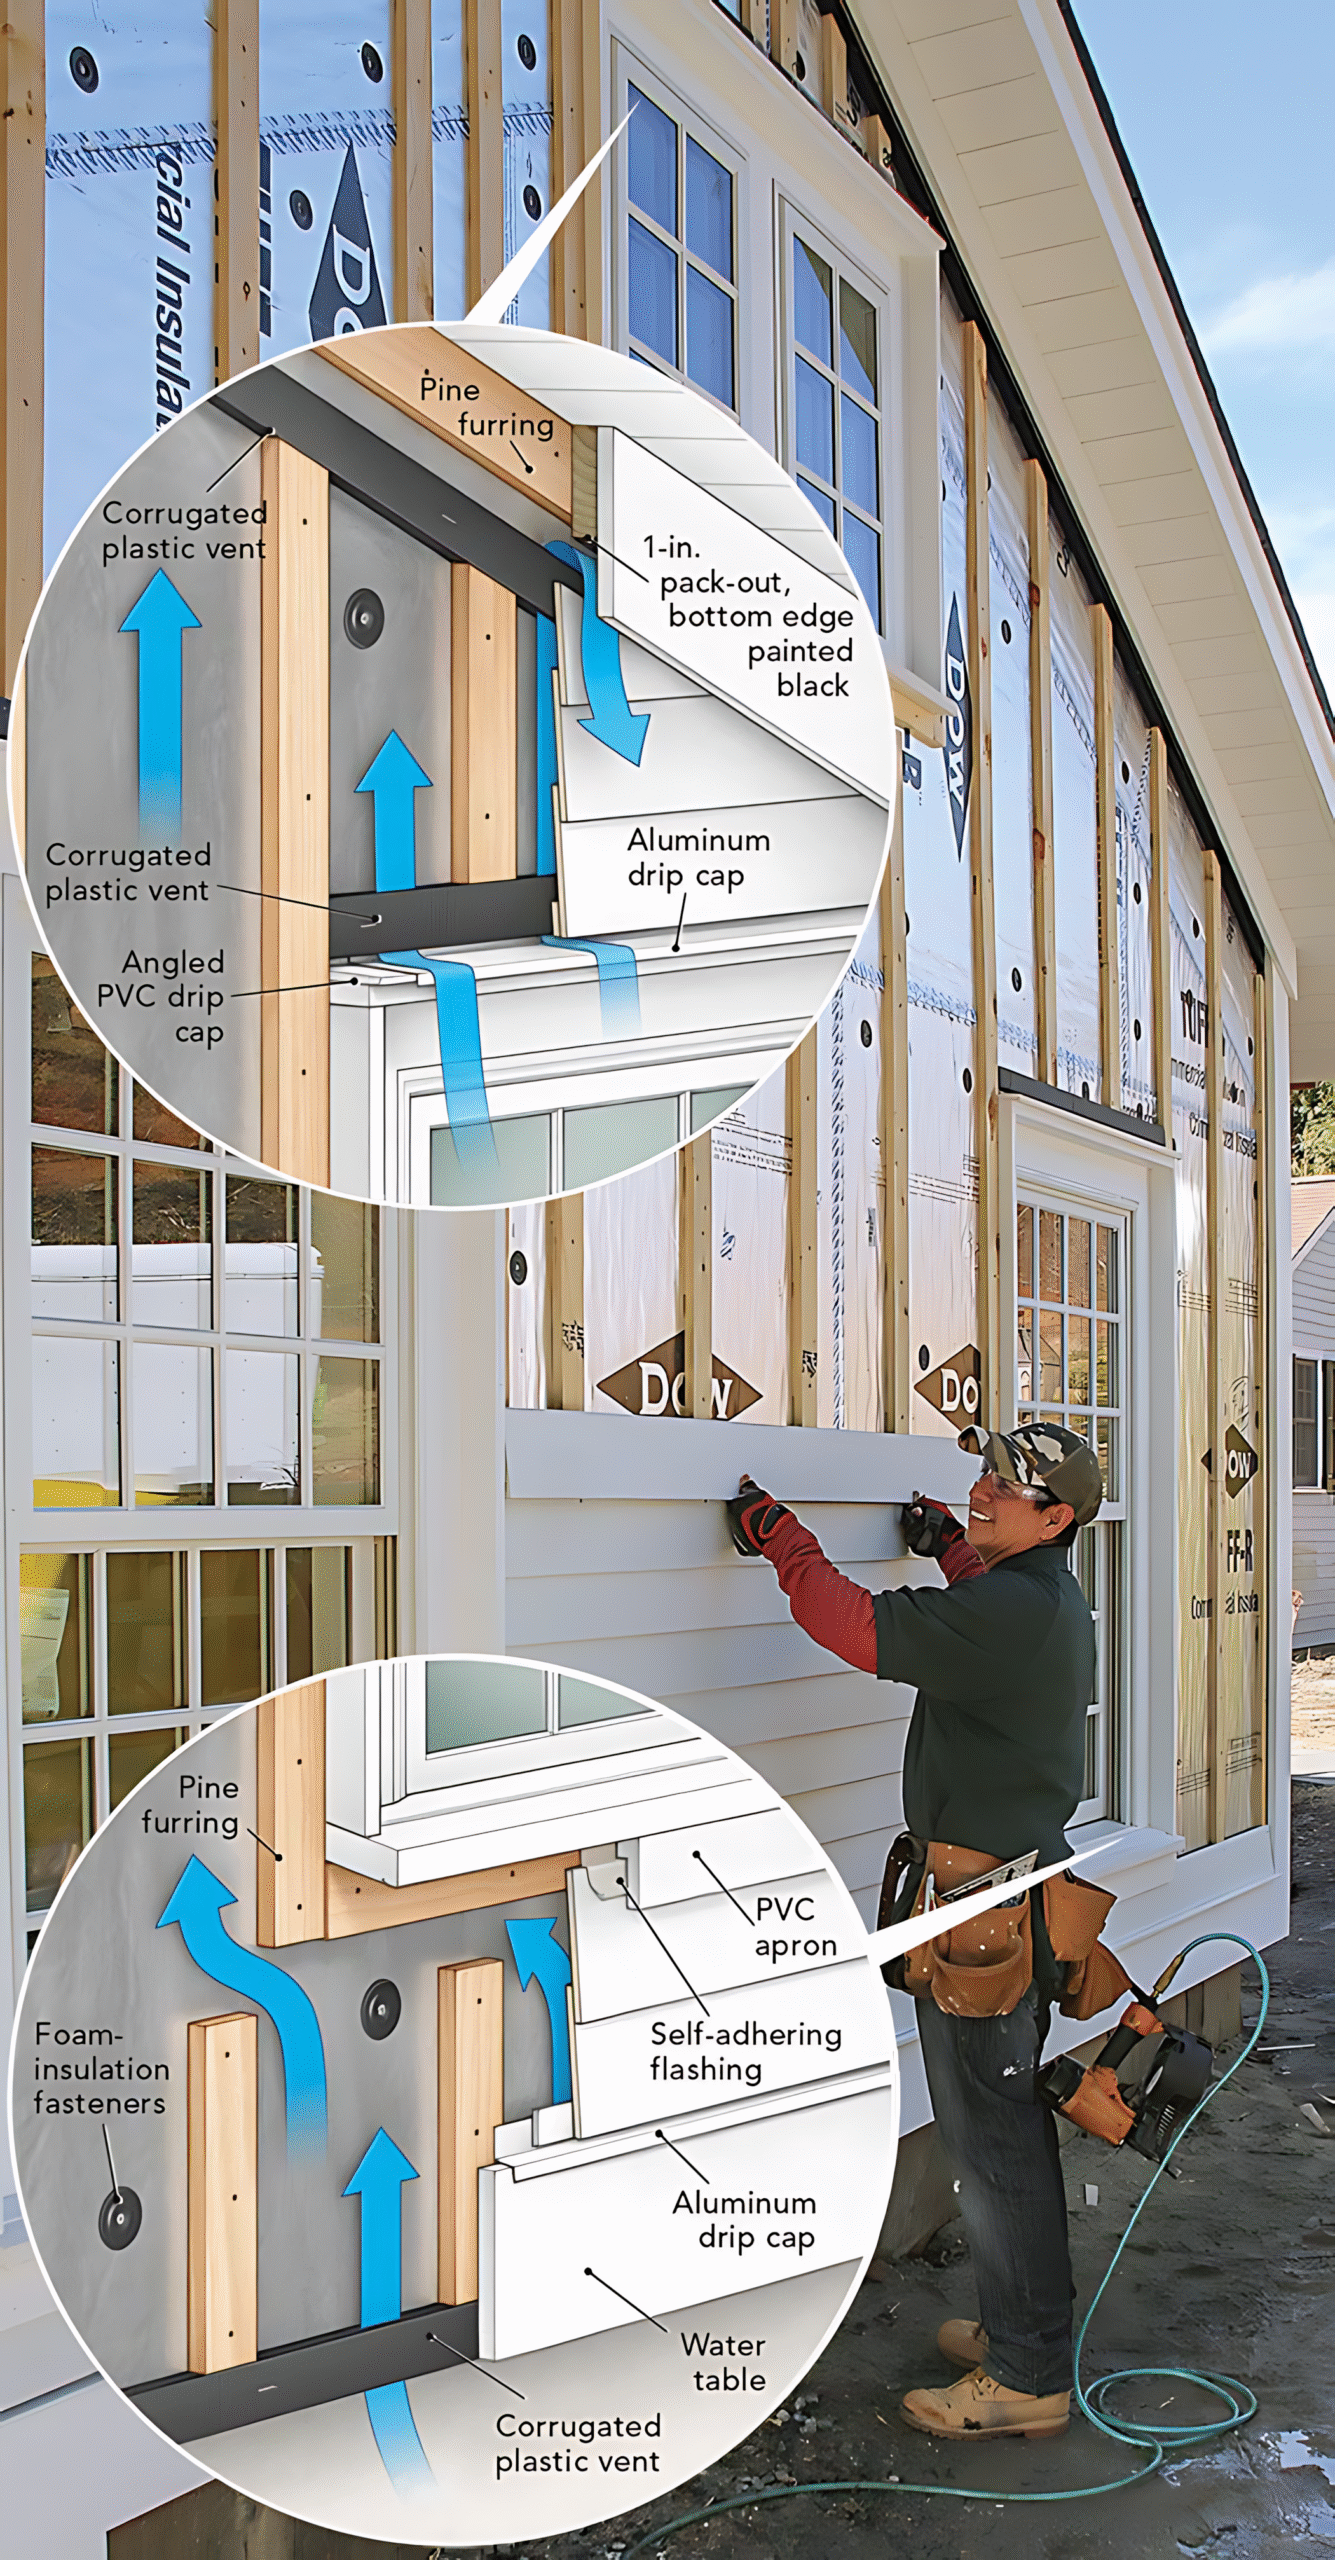
3. Adding Corrugated Vent Channels at Base and Top
At the foundation-to-wall junction, crews tack a corrugated plastic vent strip (“water table”) onto the rim, creating a continuous bottom vent that admits airflow while deflecting spray. Likewise, at the soffit-to-top-plate transition, they install a matching vent board, ensuring a chimney-effect airflow through the rainscreen cavity. Blue chalk lines mark the alignment to guide subsequent siding rows.
4. Flashing the Window Apron
Before siding begins, self-adhering flashing is applied across the window sill and up the jambs. The crew laps the flashing over the corrugated base vent and adheres it to the wrap with firm pressure. A prefabricated PVC apron trim is then seated on the flashing, its angled drip edge directing water onto the vented plane rather than behind the siding.
5. Securing the Aluminum Drip Cap
Directly above each window head, an aluminum drip cap is cut to length and slipped under the weather barrier, then nailed into the furring strips. The drip cap’s angled lip projects outward, channeling runoff clear of the siding below and protecting the flashing tape.
6. Applying the 1-Inch Pack-Out and Trim
To accommodate thicker brickmold or architectural trim, installers tack on a 1″ pack-out strip above the window opening—painted black on its bottom edge for a sleek reveal. This creates a finished shadow line and prevents siding from laying flat against protruding trim, preserving the rainscreen gap.
7. Beginning the Siding Course
With the rainscreen infrastructure in place, the team installs the first course of lap siding, resting its bottom edge on the corrugated base vent. Fastening through the siding into the furring strips ensures the boards float over the barrier. Each board is checked for level and spacing, then pinned with corrosion-resistant nails driven into the high point of the board’s back nailing flange.
8. Weaving in Drip Caps and Flashing at Openings
As siding climbs past window openings, each board butts against the PVC apron and beneath the drip cap, leaving a tight joint that sheds water. Corner trims and J-channels are fit around openings, with self-adhering flashing tucked behind for a seamless seal. The furring behind continues uninterrupted, maintaining airflow.
9. Covering the Soffit and Eaves
Up at the roofline, the soffit is ventilated with perforated panels. Underneath, the top corrugated vent strip meets the soffit vent, creating a continuous soffit-to-foundation airflow path. Fascia trim conceals the top of the rainscreen cavity and ties into the drip edge above, completing the moisture control layer.
10. Final Inspection and Finishing Touches
Before cleanup, a foreman walks the wall, testing for tight flashings, consistent air gaps and secure fasteners. Any displaced barrier tape is re-sealed; nail pops are caulked. The rainscreen cavity remains proudly open behind the siding’s shadow lines—ready to whisk away rain and allow trapped moisture to vent.
Why It Works:
By coupling vertical furring, base and head ventilation strips, and precise flashing/drip-cap details, this system creates a pressure-equalized rainscreen. Rain that penetrates the siding is drained and evaporated, rather than trapped. The result is a durable, energy-efficient envelope that keeps the look of traditional lap siding while adding modern performance.
Share this story with anyone planning a siding project—because walls that breathe don’t just look better; they last longer.