By: Staff Writer | August 5, 2025
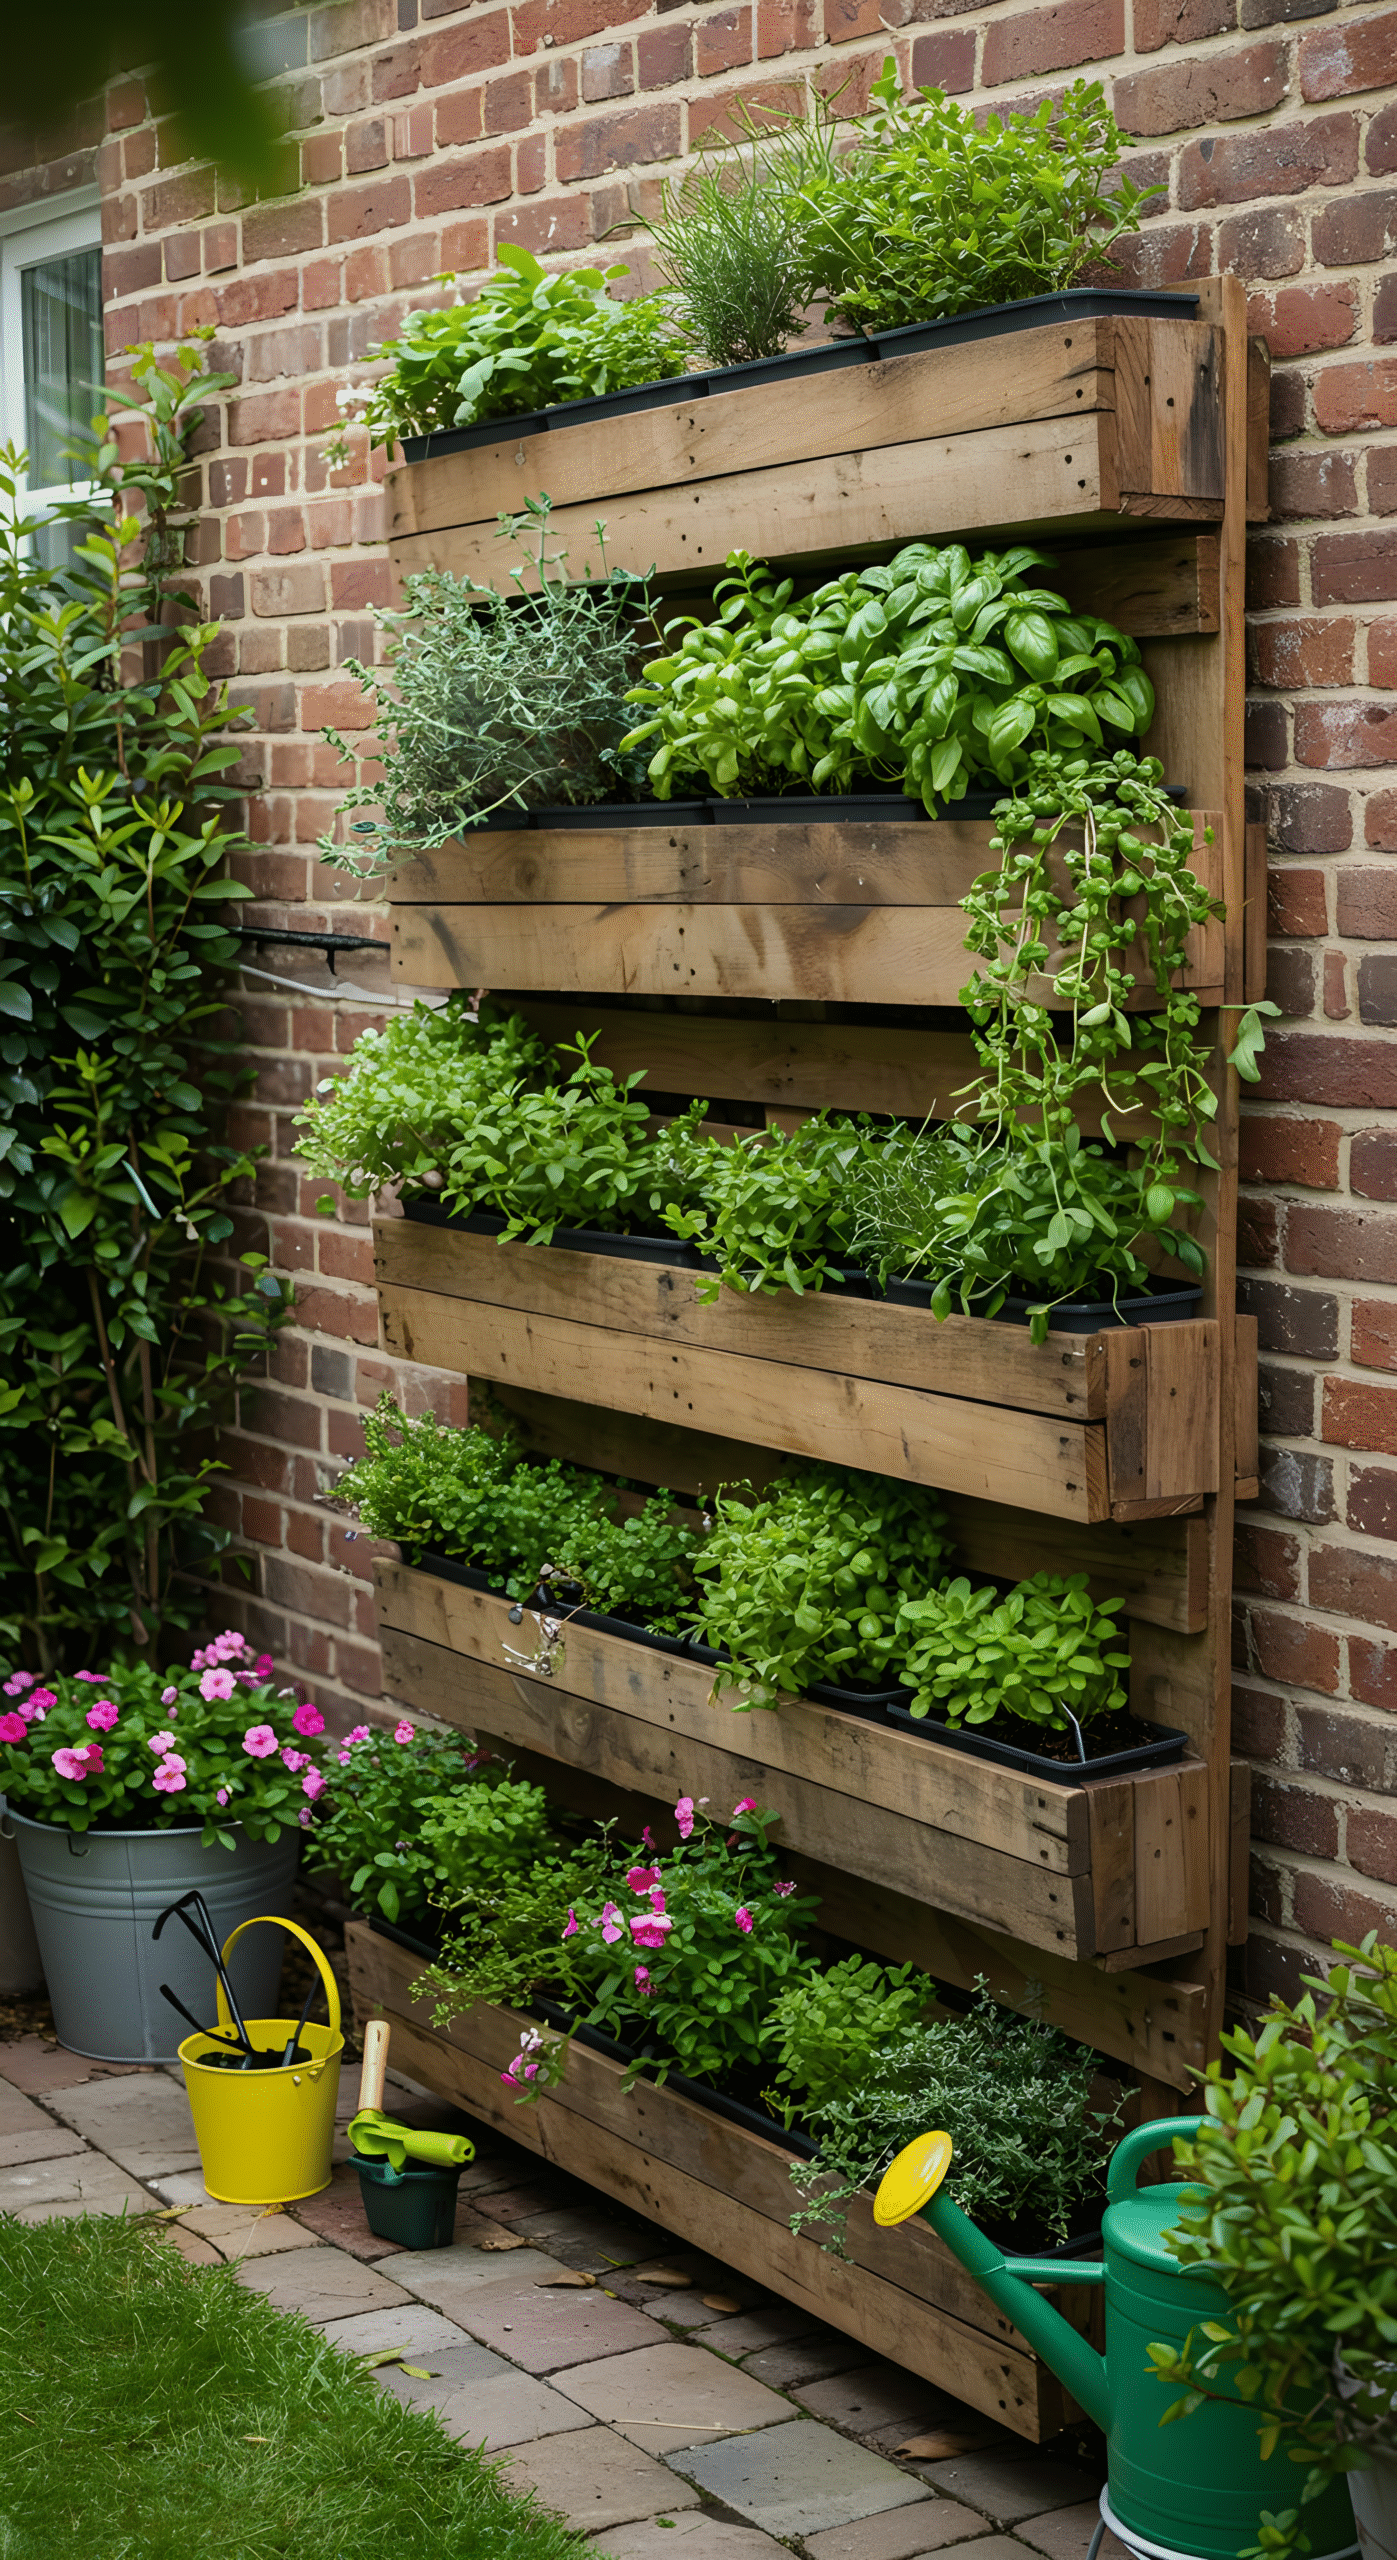
In a quiet backyard tucked between red-brick walls and a cobbled path, an extraordinary example of green living has emerged. At first glance, it might look like a simple set of wooden shelves lined with plants. But this compact, sustainable herb garden represents more than gardening — it’s a step toward urban self-sufficiency, DIY creativity, and reconnecting with nature.
This vertical garden, created from an upcycled wooden pallet, is neatly stacked with fresh basil, mint, rosemary, oregano, and a variety of other herbs and flowering plants. Perfect for tight urban spaces or anyone wanting to grow their own food at home, this garden doesn’t need a large yard — just a sunny wall, a bit of elbow grease, and a love for green living.
Here’s how you can create your own vertical herb garden, step-by-step, just like the one featured in the image.
Step 1: Gather Your Materials
Before you start building, gather the essential tools and materials:
What You’ll Need:
- 1 or more wooden pallets (preferably heat-treated, not chemically treated)
- Sandpaper or a sanding machine
- Nails or screws
- A hammer or screwdriver
- Geotextile fabric or landscape fabric (for lining)
- Staple gun and staples
- Plastic planter trays or containers (to hold soil inside each tier)
- Potting soil suitable for herbs
- Herb seedlings (basil, mint, thyme, parsley, oregano, etc.)
- Drill and saw (optional for modifications)
- Wood stain or sealant (if you want weatherproofing)
Step 2: Select the Right Pallet
Not all pallets are made equal. For gardening use, you need a pallet that is safe and non-toxic.
- Look for heat-treated pallets marked with “HT” rather than “MB” (which stands for Methyl Bromide, a toxic chemical).
- Check for any visible oil or chemical stains — avoid pallets with unknown substances on them.
- Choose a pallet that’s sturdy, free from major cracks, and ideally has back slats intact to create natural planter boxes.
Step 3: Clean, Sand, and Prep the Pallet
Before bringing the pallet into your home or garden:
- Clean the pallet thoroughly using a stiff brush and warm soapy water. Let it dry completely.
- Sand all surfaces to remove splinters and rough edges. This is especially important if the garden will be touched by children.
- Optionally, apply a non-toxic wood stain or sealant to improve durability, especially if the garden will face rain or high humidity.
Step 4: Create the Planting Pockets
To hold the soil in each row, you’ll need to line the inside of each slat space:
- Cut geotextile fabric to size and staple it inside the slats, forming a pocket that will hold soil and prevent leakage.
- Alternatively, you can insert small plastic planter trays that fit snugly within the slat gaps.
- Make sure drainage holes are present at the bottom of each pocket to prevent waterlogging.
Step 5: Secure the Pallet to the Wall
Once the planting pockets are ready:
- Choose a sunny wall — ideally, your herbs should receive at least 4-6 hours of direct sunlight daily.
- Mount the pallet securely using strong wall brackets or anchors. This prevents tipping and ensures the weight of the plants and soil won’t cause collapse.
- Leave a small gap between the pallet and the wall to allow airflow and drainage.
Step 6: Fill with Soil
With your pallet securely in place:
- Carefully add organic potting soil into each lined section.
- Don’t overfill — allow room for water and root growth.
- Consider mixing in compost or worm castings for added nutrients.
Step 7: Plant Your Herbs
Now for the fun part — adding life to your vertical garden.
Good Herbs to Start With:
- Basil – Loves sun and warmth.
- Parsley – Grows well in partial shade.
- Thyme – Hardy and aromatic.
- Mint – Thrives easily (but keep it contained).
- Rosemary – Needs good drainage and sun.
- Oregano, cilantro, chives, and lemon balm are also great options.
Planting Tips:
- Start with seedlings for faster results.
- Place taller herbs toward the top, trailing or bushy herbs near the bottom.
- Gently press each seedling into the soil, and water thoroughly after planting.
Step 8: Watering and Maintenance
- Use a watering can or hose with a soft nozzle to water evenly.
- Water early in the morning or late afternoon to avoid rapid evaporation.
- Check daily for dryness — vertical gardens can dry out faster than ground gardens.
- Trim and harvest herbs regularly to encourage new growth.
Step 9: Add Finishing Touches
You can personalize your vertical herb garden with:
- Plant labels or chalkboard tags to identify herbs.
- Decorative watering cans or buckets placed nearby for function and style.
- Solar-powered lights to illuminate your garden at night.
- Hooks on the side to hang small tools, gloves, or scissors.
Step 10: Enjoy and Expand
As your herbs begin to flourish:
- Use them fresh in cooking, teas, or natural remedies.
- Share cuttings or harvests with neighbors — building a sense of community.
- Consider expanding with a second pallet for flowers, veggies, or medicinal plants.
Why This Garden Matters
The vertical pallet garden isn’t just a DIY project — it’s a shift in lifestyle.
In urban homes where space is at a premium, growing vertically makes food production accessible. It reduces grocery bills, decreases food miles, and provides a chemical-free, deeply satisfying source of ingredients.
Moreover, the garden connects families to nature, introduces children to sustainability, and enhances air quality in tight spaces. It’s functional, beautiful, and achievable.
Conclusion: Green Walls, Greener Lives
This simple wooden pallet, leaning proudly against a garden wall, may look humble — but it’s a symbol of resilience, adaptability, and ecological consciousness.
Whether you live in an apartment, a small home, or a rural setting, this vertical herb garden shows that you don’t need a lot of space to grow something meaningful. With just a few hours of work and a dash of creativity, you can transform a bare wall into a fragrant, food-producing powerhouse.
As you water your mint and snip fresh basil for dinner, you’ll be reminded that even the smallest gardens can root us deeply — to the Earth, to our health, and to a greener way of living.