A detailed, step-by-step, guide to redesigning your tiered stone herb planter—covering foundation, wall angle, drainage, soil stratification, and plant placement—to ensure longevity, moisture control, and bountiful growth.
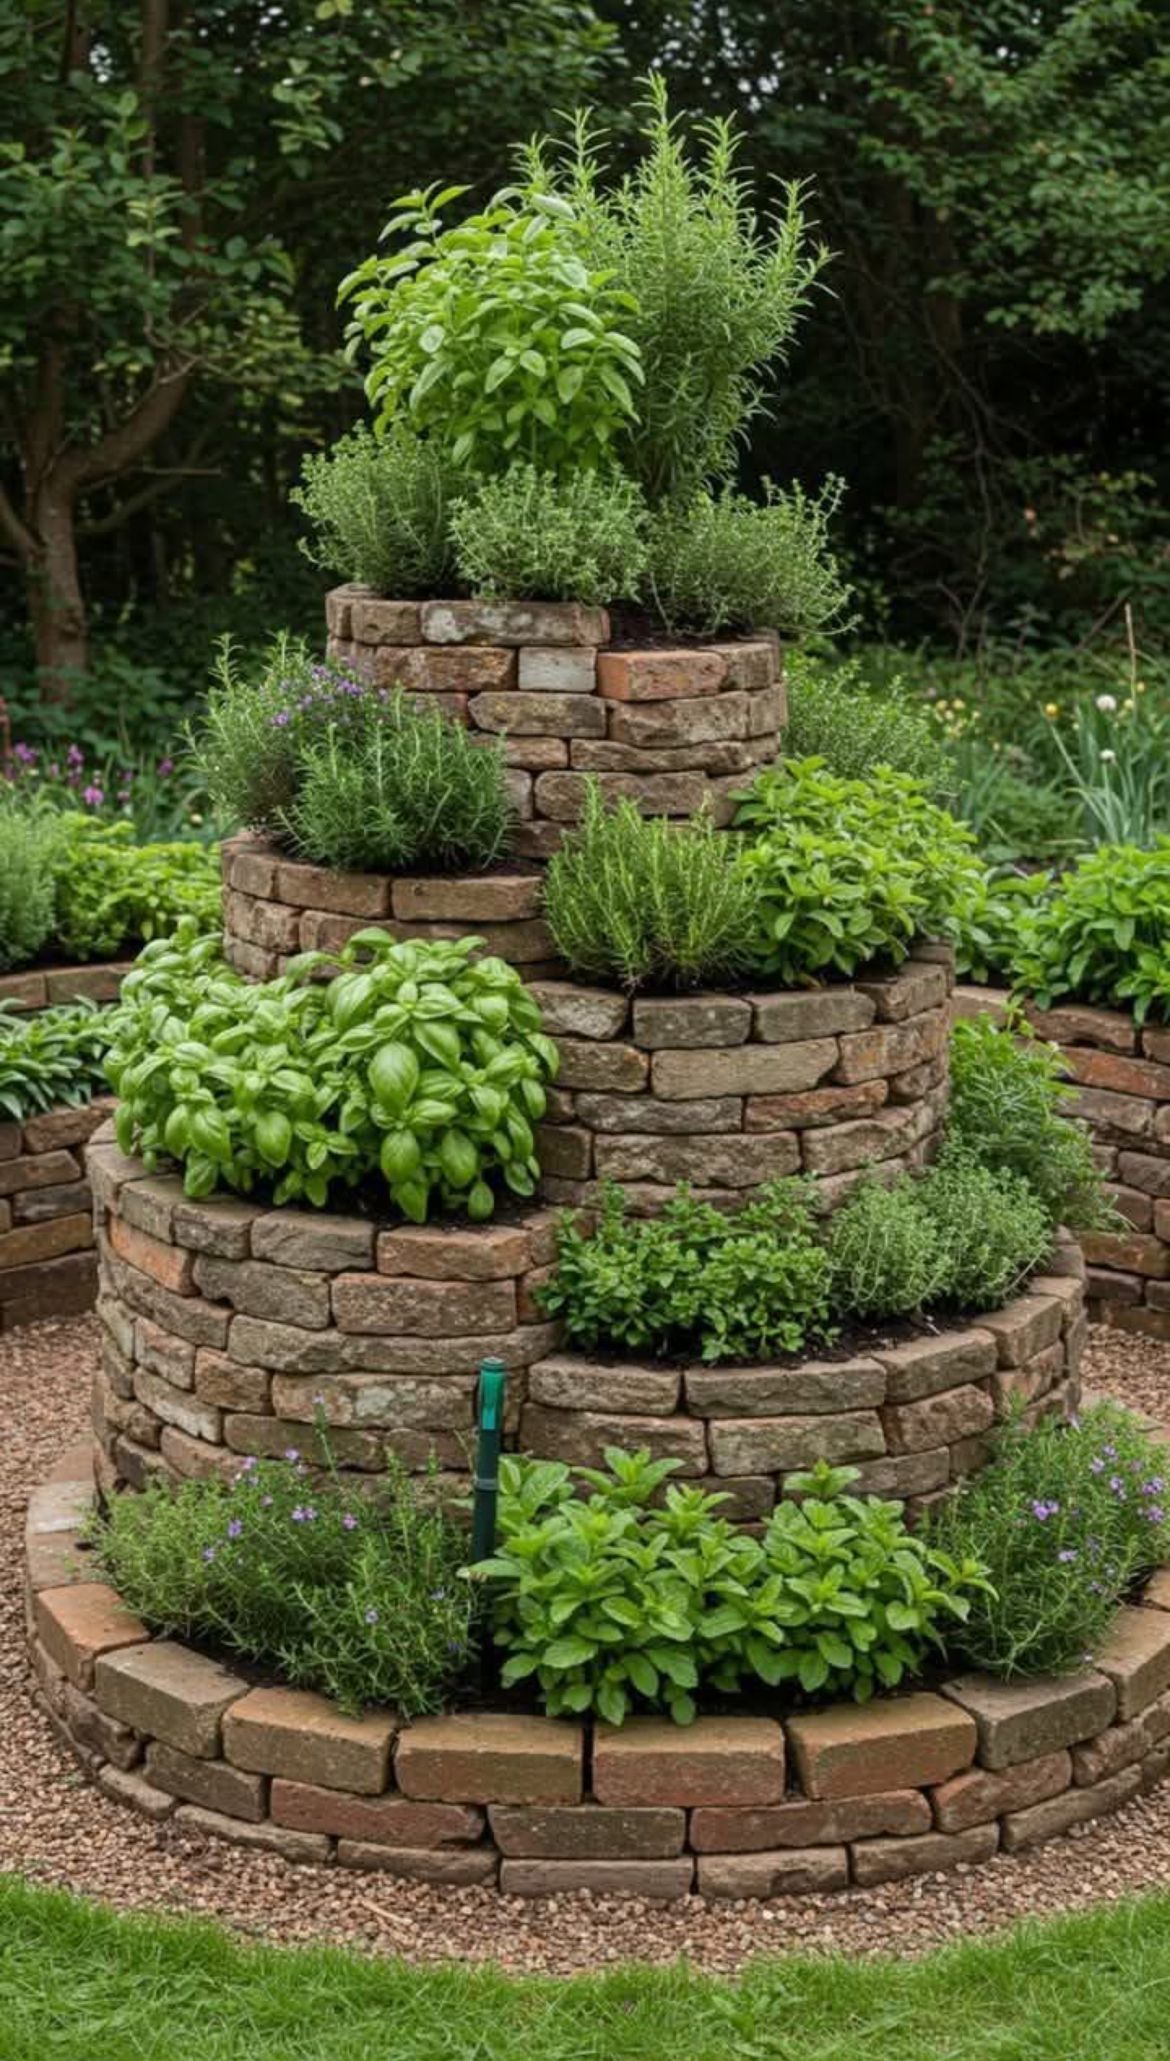
Adding a spiral herb tower to your garden not only creates a stunning focal point but also maximizes planting area in a compact footprint. Yet many DIY versions suffer from structural instability, poor drainage, and uneven soil moisture—leading to collapsing walls, root rot at the bottom, and sun-starved plants at the top. In this in-depth report, we’ll diagnose the typical errors seen in the tiered stone planter above and walk you through a precise, seven-phase renovation plan to rebuild your spiral herb garden correctly from the ground up.
Phase 1: Inspecting and Reinforcing the Foundation
Common Mistake: Simply stacking bricks on bare soil or gravel, causing walls to settle and bow outward under weight and moisture.
- Assess the Existing Base:
- Remove any loose bricks on the bottom course.
- Probe the soil beneath with a trowel—if it’s soft or shifts easily, it needs reinforcement.
- Excavate and Level the Pad:
- Dig out a 12″-wide trench around the entire spiral footprint, to a depth of 6–8″ below grade.
- Backfill with compacted crushed gravel (¼″–½″ stone) in 2″ lifts, tamping each layer firmly.
- Use a long level and straightedge to ensure the gravel pad is perfectly flat and conforms to the spiral’s intended footprint.
- Install a Concrete Collar (Optional for High-Traffic or Windy Sites):
- For extra stability, pour a 3″-thick concrete ring atop the gravel pad, matching the trench width. Allow 24 hours to cure before rebuilding.
- Lay the First Course on Mortar or Landscape Adhesive:
- Use a high-performance, exterior-grade mortar mix or stone adhesive to bond the first ring of bricks or stones firmly to the foundation.
- Check for level in all directions; this course sets the geometry for the entire tower.
Phase 2: Correcting Wall Batter and Tier Alignment
Common Mistake: Vertical or outward-leaning courses that invite collapse; uneven tier widths that disrupt the spiral continuum.
- Determine the Ideal Batter (Inward Slope):
- A slight inward tilt—about 1:20 (3°)—ensures each course locks into the one below under the weight of soil.
- Mark a plumb line from the center stake; at 12″ up, measure in ½″. Snap a chalk line on the brick face to guide your batter.
- Stagger and Interlock Stones:
- Offset each brick joint by at least one-half brick length from the course below. This “running bond” pattern distributes load evenly and prevents vertical seams.
- Maintain Consistent Tier Heights:
- Plan for 6″–8″ of interior planting depth per tier. Use a scrap piece of lumber or a 2×8 spacer between outer and inner rings to keep wall thickness consistent as you spiral upward.
- Check Horizontally and Vertically:
- After every two courses, place a 4-foot level across the top of the ring to confirm your batter remains uniform.
- Use a torpedo level along the face of the wall to ensure no unintended bulges or dips.
Phase 3: Ensuring Proper Drainage and Soil Stratification
Common Mistake: Flood-prone bottom tiers leading to root rot, and nutrient-poor soil at upper levels causing stunted growth.
- Insert a Filter Fabric Liner:
- Before back-filling, line the interior wall with breathable landscape fabric. This retains soil while allowing excess water to escape through wall joints.
- Create a Drainage Layer:
- Place 3″–4″ of coarse gravel or small river rock at the bottom of the planter. This collects excess moisture away from the soil zones.
- Add a Drainage Pipe Outlet (Optional):
- Drill a 1″ weep hole through the bottom brick course at the down-slope side, or embed a perforated PVC stub-out to direct surplus water into a rock-filled French drain.
- Layer Your Soil Mix “Lasagna” Style:
- Base Mix (Tier 1): 50% quality garden loam, 30% coarse sand, 20% well-aged compost for superior drainage.
- Middle Mix (Tier 2–3): 40% loam, 30% sand, 30% compost to retain moderate moisture.
- Top Mix (Upper Tiers): 30% loam, 30% sand, 40% compost blended with a handful of biochar for nutrient retention in shallow beds.
Phase 4: Re-building the Spiral Core for Accessibility
Common Mistake: A tightly wound spiral that’s impossible to reach or harvest without deforming soil.
- Establish a Gentle Incline:
- Aim for a path width of 12″ on the inner spiral to accommodate hand tools and fingers.
- Adjust each inner ring’s diameter so you can comfortably reach its center from the walkway.
- Define the Walkway Surface:
- Spread 1″ of decomposed granite or pea gravel between rings to create a firm footing and discourage weeds.
- Compact with a plate compactor or tamper to produce a stable walking path.
- Maintain Continuity in Tier Edges:
- Use uniform stone dimensions around the inner edge to prevent soil spillage into the walkway and to provide a defined border for maintenance.
Phase 5: Optimizing Sun Exposure and Microclimates
Common Mistake: Placing sun-loving herbs in shaded lower tiers and moisture-dependent plants at the exposed top.
- Orient the Spiral Strategically:
- Position the tallest (center) of the spiral to the north in the Northern Hemisphere—so lower tiers won’t shade upper levels.
- If your site has prevailing wind from one direction, orient a solid herb (rosemary, sage) on the windward side as a natural windbreak.
- Plan Plant Zones by Sun and Moisture Needs:
- Inner Core / Top Tier (Full Sun, Fast-Draining): Mediterranean herbs—rosemary, lavender, oregano.
- Middle Tiers (Partial Shade, Moderate Moisture): Parsley, thyme, chives.
- Outer / Lower Rings (More Moisture, Shade): Mint, cilantro, basil. Use mint in pots set into the gravel to contain its spread.
- Account for Seasonal Shading:
- In summer, sun rises north‐east—consider slight adjustments to tier orientation if you want morning vs. afternoon sun domination.
Phase 6: Planting and Mulching for Health and Maintenance
Common Mistake: Overcrowding tiers, which reduces air circulation and invites disease.
- Space Plants Correctly:
- Adhere to packet recommendations: most herbs need 6″–12″ apart.
- Use a soil dibber or trowel as a gauge to maintain consistent spacing across each tier.
- Mulch with Organic Material:
- Apply a 1″ layer of chopped straw or pine bark nuggets around the plants—not against stems—to suppress weeds and conserve moisture.
- Install Drip Irrigation or Micro-Sprayers:
- Run low-volume drip tubing with ¼-GPH emitters at each plant station. This targets water to roots without flooding the drainage layer or paths.
- Stake or Cage Top-Heavy Varieties:
- Some herbs (e.g. sweet basil, lemon verbena) can flop as they mature. Insert small U-shaped tomatillo cages or bamboo stakes immediately after planting.
Phase 7: Ongoing Care and Seasonal Adjustments
Common Mistake: Neglecting structural settling, leading to bulges, gaps, and eventual wall failure.
- Monitor and Re-Level Annually:
- Each spring, check the batter and alignment of the first three courses. Tighten or re-adhere any loose stones with fresh mortar.
- Top-dress the drainage layer if settling has encroached upward into your soil mix.
- Rotate Annual Herbs:
- After 12–16 months, remove spent plantings and rotate in new varieties. This prevents soil depletion and discourages pest cycles.
- Refresh Soil Mixes:
- Every two years, remove the top 4″ of soil from each tier and replace with fresh compost-rich mix. This maintains fertility and structure.
- Winterize Vulnerable Plants:
- Wrap top tiers with horticultural fleece or move potted herbs indoors. Drain irrigation lines and close off weep or drain holes to prevent freeze‐thaw damage.
Conclusion
By rigorously following this seven-phase overhaul—stabilizing the foundation, correcting wall batter, engineering reliable drainage and soil stratification, carving a safe spiral path, optimizing microclimates, planting with precision, and adopting annual maintenance—you’ll transform a collapsing, waterlogged herb tower into a robust, productive garden feature. Each detail—from the mortar choice on Course 1 to the spot-placement of a rosemary windbreak—ensures your spiral herb planter not only endures the elements but also thrives, delivering an abundant, aromatic harvest season after season.