1. Laying Out and Securing the Ledger
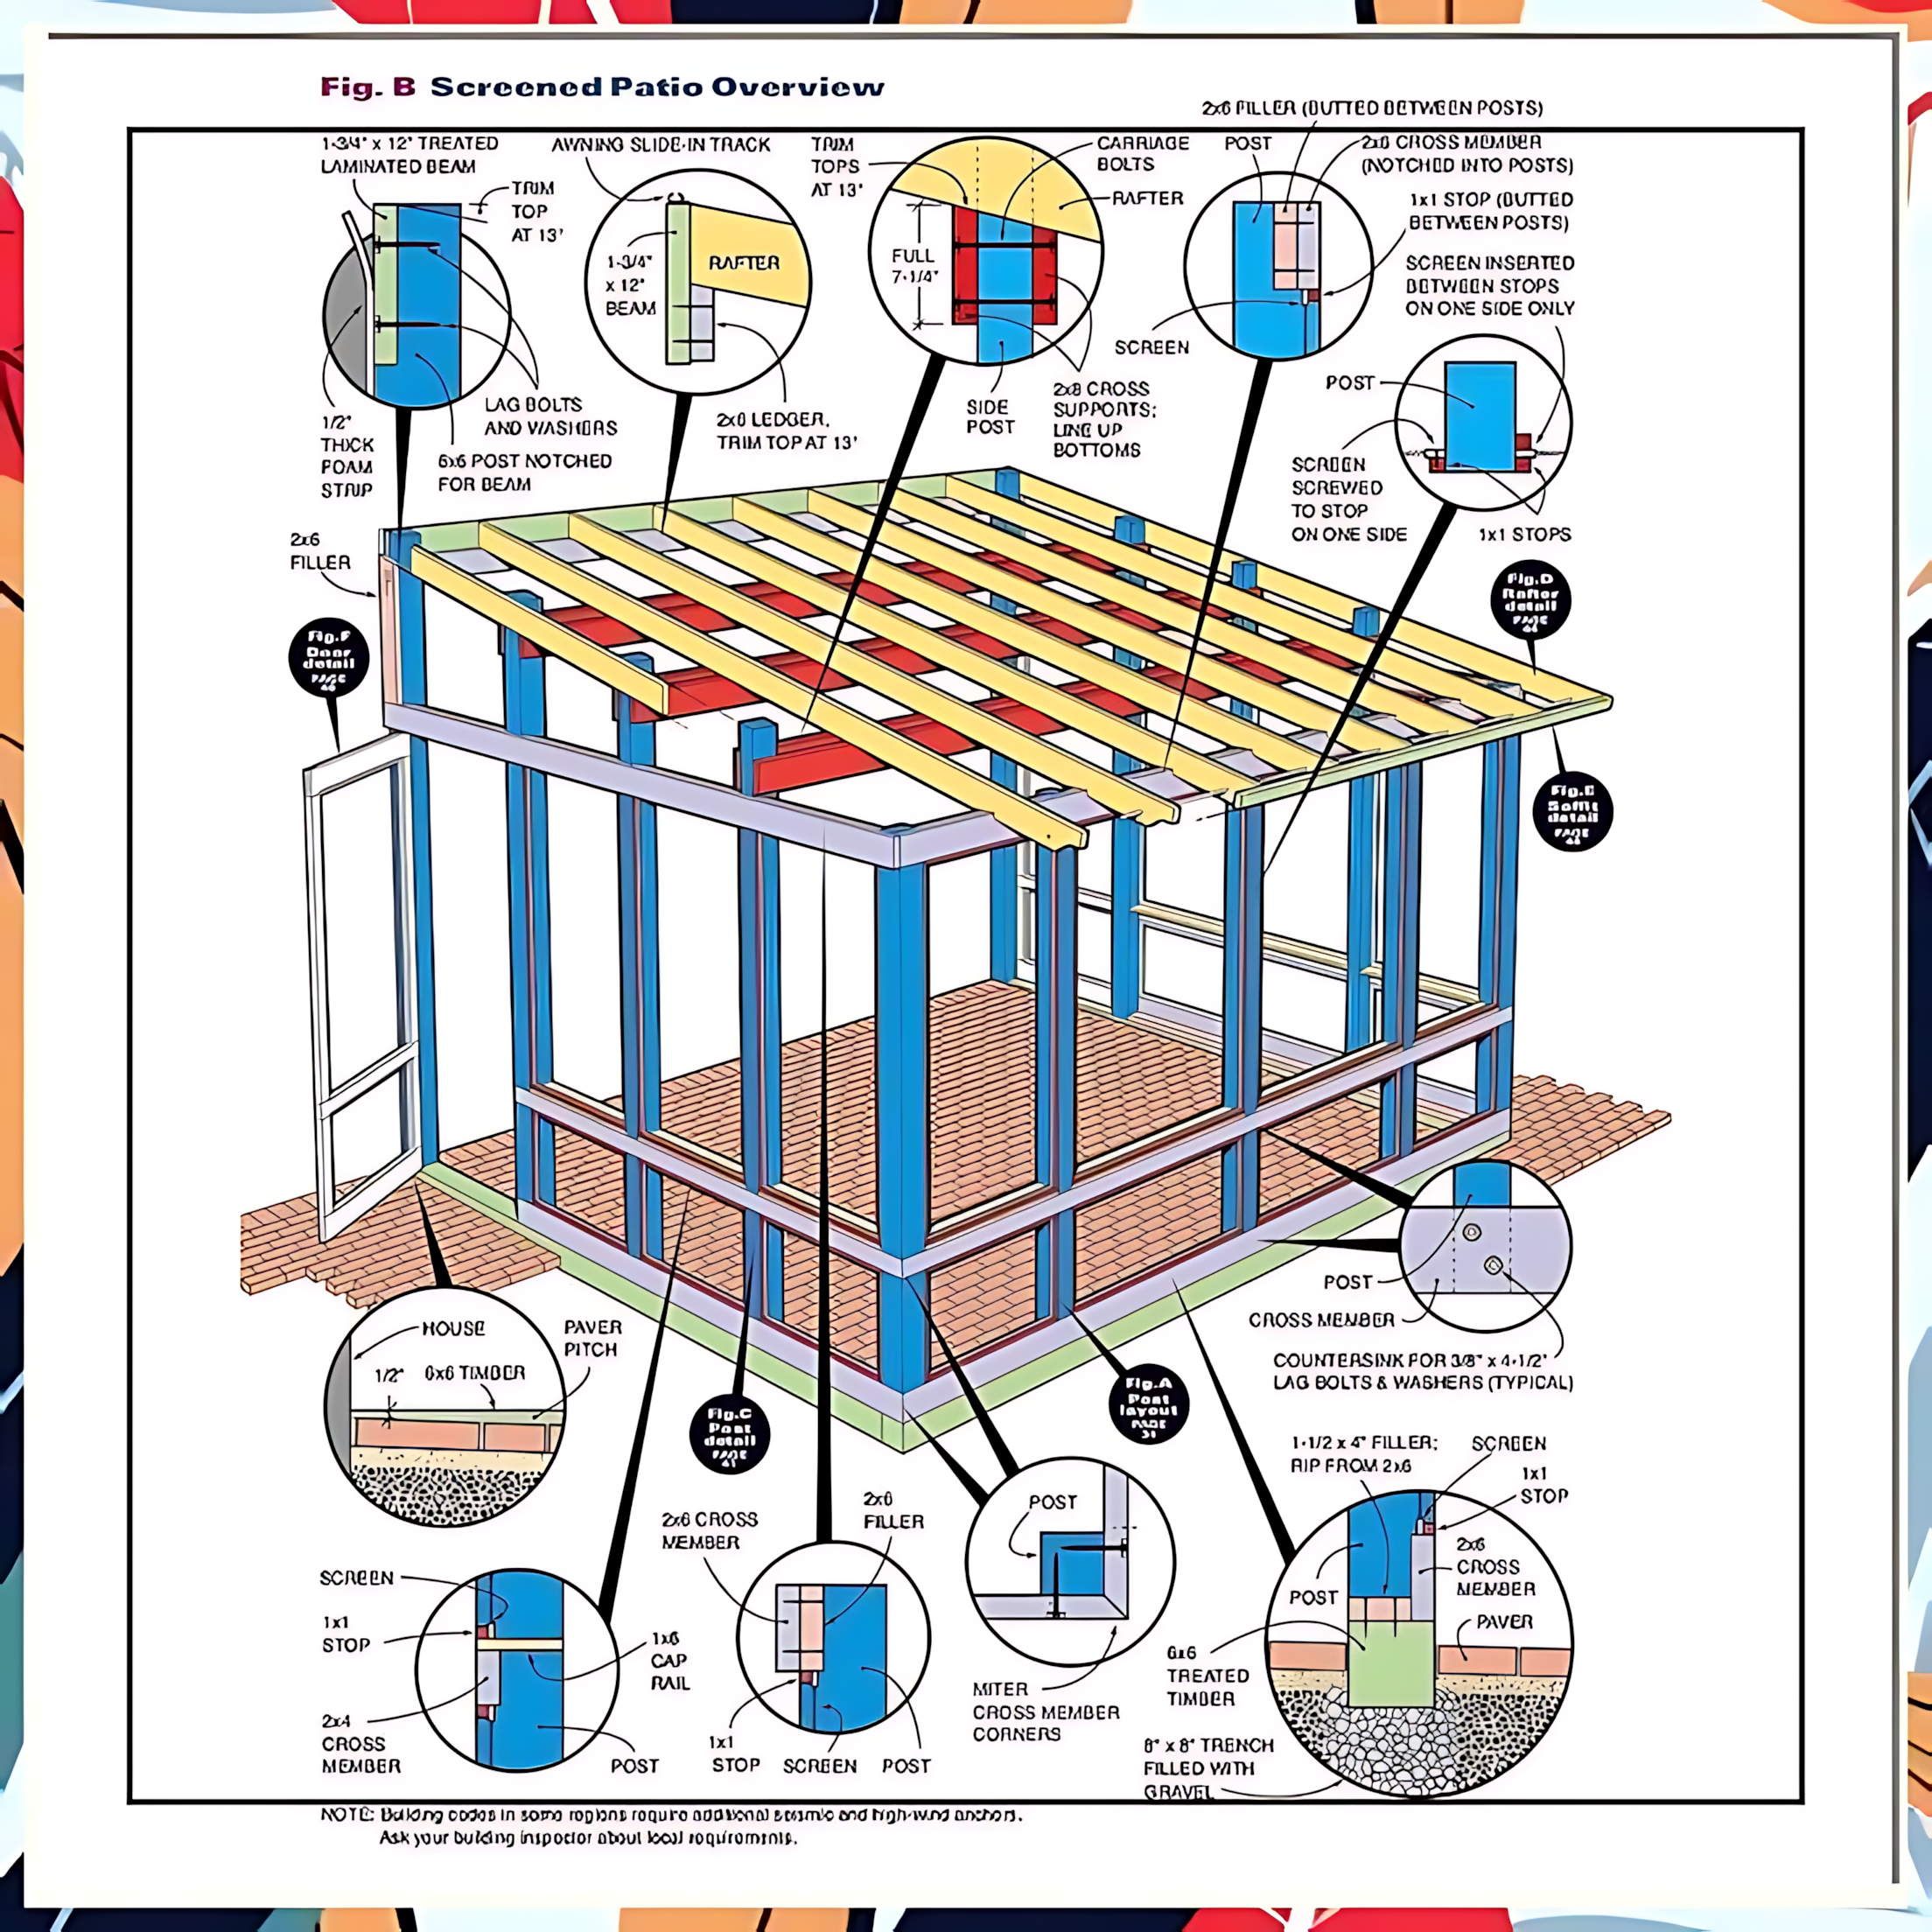
Before any digging, the builder marks the exact outline of the future screened enclosure against the house’s brick wall. A 2×6 treated ledger board is fastened at 13-foot height using lag bolts and washers, with 1⁄2″ foam strips behind to keep moisture off the siding. This solid ledger becomes the back anchor for rafters and roof framing.
2. Setting the Piers and Posts
Next, an 8″×8″ trench—backfilled with gravel—is prepared for continuous footing beneath the screen posts. At each corner and midpoint, crews sink 6×6 treated timber posts into the gravel trench. The posts sit on 1′-square concrete piers below grade, and are shimmed plumb before the gravel is compacted around them.
3. Installing Cross Members and Filler Boards
With posts in place at 48-inch centers, 2×6 cross members are notched and bolted between posts using 3⁄8″×4-1⁄2″ lag bolts with countersunk washers. A 1×1 wooden “stop” strip is then screwed to the inside face of each cross member. This stop holds the bottom edge of the mesh screen firmly in place while allowing it to slide into position during final assembly.
4. Framing the Roof with Laminated Beams and Rafters
A 1-3⁄4″×12″ laminated beam spans house to outer posts on one side, with a matched beam on the opposite side. These beams carry the rafters. Into these beams slide the 2×0 rafters (trimmed tops at 13° bevel), each riding on a slip-in awning track for a snug, weather-tight fit. Rafters are set on 24″ centers and lined up over cross members for even load distribution.
5. Securing the Top Trim and Flashing
Once rafters are all engaged in their tracks, a 2×0 fascia board runs across the rafter ends, covering the track and creating a clean roof edge. At the house wall, the trim top at 13° directs water away and tucks under a dedicated metal flashing strip—preventing leaks where the new roof meets the existing brick.
6. Inserting and Anchoring the Screen Panels
With the shell framed, the builder unrolls fiberglass mesh panels and tucks the bottom edge into the 1×1 stops. As the screen ascends, it slides between the 2×0 filler pieces set at the tops of openings—ensuring tension. Trim stops on one side keep each panel from slipping inward; on the other side, the screen is screwed in place. Between posts, small 2×6 filler blocks finish off the gaps.
7. Adding the Door and Threshold Detail
At the designated opening, a pre-hung screen door is plumbed into place. Beneath it, a 1⁄2″×6″ timber threshold rests on the paver field, gently sloped to shed water. This detail—shown in the “house–paver pitch” inset—ensures the transition from patio floor to door sill is snug, yet drains properly.
8. Securing Corners and Mitered Connections
Each corner post receives a mitered cross-member joint (as in the “miter cross member corners” detail) for clean, flush edges. Lag bolts tighten these members to the posts from the outside face, hidden under the future exterior trim.
9. Installing the Laminated Roof Planks
On top of the rafters, ¾″-thick decking planks (sold as “roof planks”) are fastened running from house to fascia. This solid surface will later be covered by roofing felt and shingles or metal roofing, offering year-round protection.
10. Final Touches: Flashing, Trim and Paint
All exposed edges—beam ends, post tops and cross-member faces—are capped with trim boards painted to match the house. Flashing at the ledger is caulked, and drip edges added at the fascia. The gravel trench is topped with pavers set in sand, creating a level, attractive patio floor that ties back into the landscape.
Engagement Note:
This screened patio build relies on off-the-shelf lumber, simple hardware and clever “slide-in” rafter tracks—no cranes or exotic connectors. By marrying precision notches with straightforward lag-bolt details, you get a sturdy, weather-tight outdoor room in a weekend. Share your own before-and-after shots or tag someone dreaming of a bug-free backyard retreat!