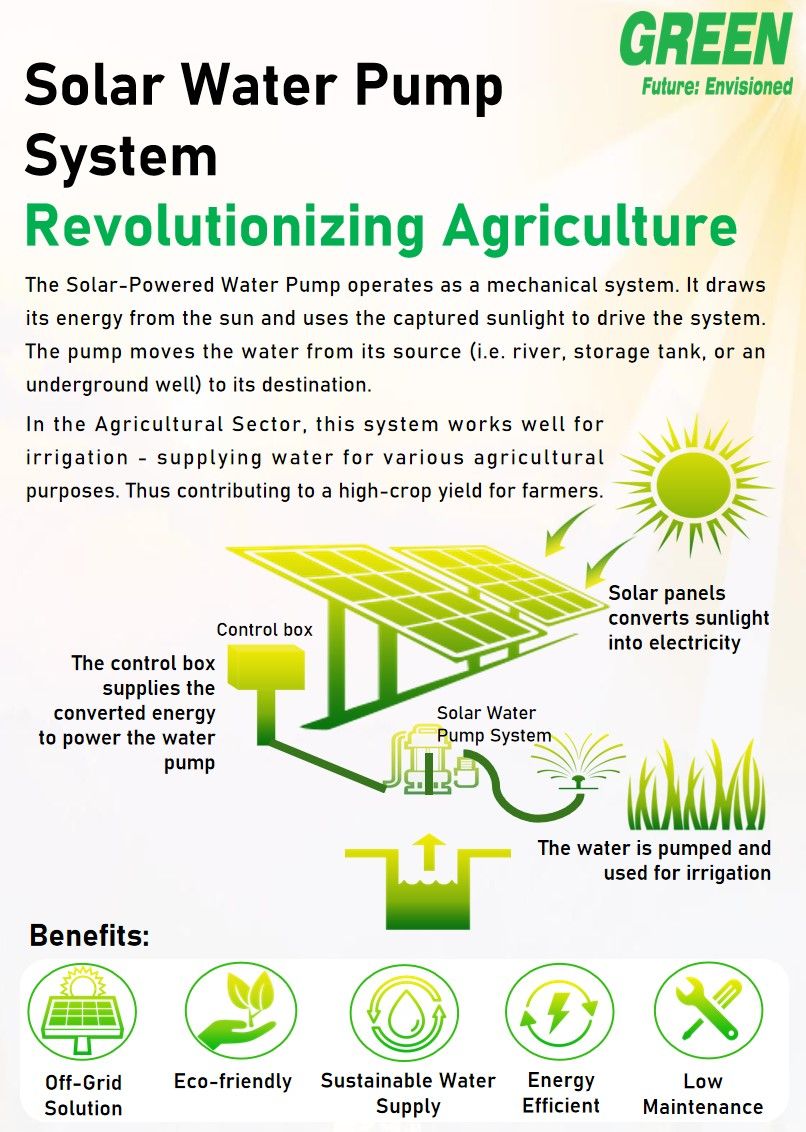
A step-by-step, guide to diagnosing and correcting design and installation errors— from panel oversizing and missing MPPT controllers to insufficient piping and lack of storage—so your solar-powered pump delivers consistent, energy-efficient water flow year-round.
In the quest for sustainable agriculture and off-grid living, solar-driven water pumps promise an eco-friendly solution—yet far too many installations falter due to one or more avoidable mistakes. Panels go un-matched to pump requirements, controllers are omitted or mis-configured, intake and delivery piping chokes flow, and lack of storage leaves farmers stranded when clouds roll in. In this in-depth guide, we’ll walk through each critical component of a solar water pump system, identify the most common missteps, and provide a clear, seven-phase correction plan to optimize performance, ensure reliability, and maximize crop yields.
Phase 1: Right-Sizing Your Solar Array
Mistake: Installing an undersized or oversized panel array leads to poor pump operation or wasted investment.
- Calculate Pump Power Needs:
- Obtain the pump’s wattage rating at its operating point (flow rate and head).
- Example: A 1,500 W pump drawing 12 A at 120 VAC.
- Determine Peak Sun Hours:
- Use local solar insolation data: e.g., 5 peak sun hours/day.
- Compute Required Array Size:
- Required daily watt-hours = pump wattage × run hours.
- If you run 6 hours/day: 1,500 W × 6 h = 9,000 Wh.
- Panel array = 9,000 Wh / 5 h = 1,800 W.
- Include 20 % system losses: 1,800 W × 1.2 ≈ 2,160 W total.
- Select Panel Configuration:
- Use 12 panels × 200 W each = 2,400 W. Wire in series/parallel to match pump voltage and controller input.
Phase 2: Choosing and Configuring the Controller
Mistake: Omitting a Maximum Power Point Tracking (MPPT) controller or using a simple PWM device—resulting in up to 30 % power loss.
- Why MPPT Matters:
- It continuously adjusts voltage/current to extract maximum power from panels as irradiance and temperature change.
- Sizing the Controller:
- Voltage rating ≥ open-circuit voltage (Voc) of panel string.
- Current rating ≥ short-circuit current (Isc) × 1.25.
- Wiring and Settings:
- Connect panels to MPPT input.
- Set the controller’s output voltage to match pump motor specifications (e.g., 48 V DC).
- Enable any built-in safety timers or low-voltage shutdown to protect the pump.
Phase 3: Streamlining Intake and Delivery Piping
Mistake: Undersized, overly long, or poorly anchored pipes causing excessive friction losses and airlocks.
- Calculate Optimal Pipe Diameter:
- Aim for pipe velocity of 3–5 ft/s.
- Example: For 10 gpm pump, Q = 0.022 cfs. Required area = Q/velocity ≈ 0.0044 ft² → diameter ≈ 2.5″. Use 2″ minimum.
- Minimize Length and Fittings:
- Keep suction and discharge runs as short and straight as possible.
- Use gradual fittings (sweeps) instead of sharp elbows to reduce turbulence.
- Prevent Airlocks:
- Install automatic foot-valve with quality strainer at intake.
- Prime lines and include a bleeder valve at the highest point.
- Anchoring and Support:
- Secure pipes every 3–5 ft with clamps to prevent vibration and sag.
Phase 4: Integrating Adequate Storage
Mistake: Relying solely on real-time pumping—leaving no buffer for cloudy days or peak demand.
- Sizing Your Storage Tank:
- Determine daily irrigation requirement (e.g., 5,000 L/day).
- Provide at least 1–2 days of storage: 10,000 L tank.
- Tank Placement and Height:
- For gravity feed, mount tanks on towers to achieve desired pressure (0.1 bar per meter).
- A 5 m elevation gives ~0.5 bar (~7 psi).
- Float Switch Automation:
- Install high/low float switches to start the pump when tank level falls below set point and shut off when full.
Phase 5: Electrical Safety and Grounding
Mistake: Skimping on conduits, using non-DC rated wiring, and neglecting grounding—creating electrocution and fire hazards.
- Wire Selection:
- Use UV-resistant, PV-rated cables for panel runs.
- For pump leads, choose marine-grade, direct burial DC cable sized for <3 % voltage drop.
- Conduit and Junction Boxes:
- Run all DC wiring in UV-protected conduit.
- Weatherproof, lockable junction boxes with proper strain relief.
- Grounding and Lightning Protection:
- Bond panel frames and controller chassis to a grounding electrode system.
- Consider DC surge arrestors and AC surge protectors for controller output.
Phase 6: Routine Maintenance and Monitoring
Mistake: Installing and forgetting—leading to dirty panels, fouled intakes, and undetected faults.
- Panel Cleaning Schedule:
- Wash panels with soft brush and de-ionized water monthly or after dust storms.
- Filter and Strainer Checks:
- Inspect foot-valve strainer weekly during irrigation season. Clean out debris to maintain flow.
- Controller and Pump Logs:
- Record daily run times, voltages, and flow rates.
- Flag any drop in performance (e.g., 10 % less flow than baseline) for inspection.
Phase 7: Troubleshooting Common Issues
- Low Flow Despite Full Sun:
- Check for air leaks in suction line, blocked strainer, or closed valves.
- Verify MPPT controller is tracking correctly—look for “MPP” indication.
- Pump Cycling On/Off Rapidly:
- Likely float switch mis-adjustment or wiring fault.
- Inspect switch heights and cable continuity.
- Panels Overheating or Controller Shutting Down:
- Ensure adequate ventilation around the controller.
- Verify wiring torque on terminals and clean any corrosion.
- System Yields Less in Winter:
- Accept seasonal performance drop.
- For critical irrigation, plan supplemental power (wind, backup generator, or grid-tie inverter).
Conclusion
By following this seven-phase correction plan—right-sizing panels, installing an MPPT controller, optimizing piping, adding proper storage, enforcing electrical safety, committing to regular maintenance, and knowing how to troubleshoot—you’ll transform a temperamental solar water pump into a robust, low-maintenance powerhouse. Whether you’re irrigating a small market garden or supplying a remote homestead, these best practices ensure your off-grid system harnesses every ray of sun to deliver reliable, energy-efficient water flow throughout the seasons.