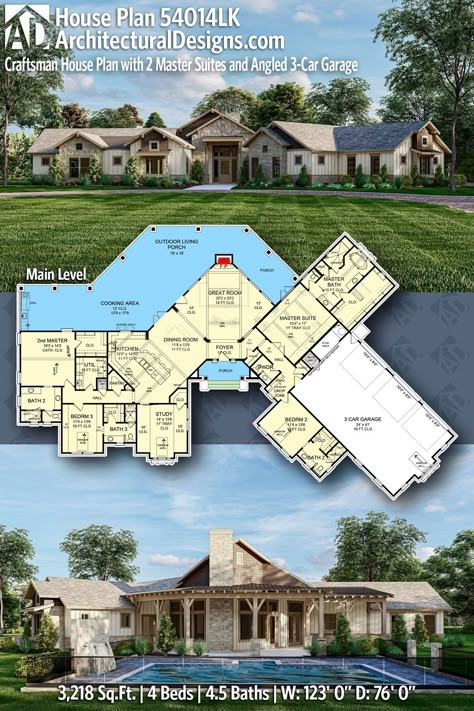
📰 Today’s Build Bulletin: Craftsman House Plan 54014LK
1. Site Layout & Preparation
Headline: “Staking Out the Dream Home Footprint!”
Step-by-Step:
- Survey & Mark-Out: Stake corners for the 123′×76′ building envelope, front porch, and 42′×15′ outdoor living porch.
- Clearing & Grading: Remove trees/vegetation, rough-grade to finish elevation, install silt fences.
- Utility Trenches: Excavate for water, sewer, gas, electric, and temporary site power.
2. Concrete Foundation & Slab
Headline: “Rock-Solid Base Poured in Place!”
Step-by-Step:
- Footing Trenches: Excavate continuous footings under all load-bearing walls and the 3-car garage wing.
- Formwork & Rebar: Build wood forms; place #4 rebar per engineer’s grid in footings and slab.
- Concrete Placement: Pump high-strength mix; screed and finish garage slab and main floor area.
- Curing: Cover with plastic sheeting and mist for 5–7 days to achieve full strength.
3. Structural Framing & Angled Garage
Headline: “Walls Rise & Garage Takes Shape!”
Step-by-Step:
- Sill Plates & Anchors: Bolt treated sill plates to the cured slab at 6′-o.c.
- Wall Studding: Frame 2×6 exterior walls—layout the two master suites wings, four bedrooms, study, and great room.
- Angled Garage Wing: Erect the 3-car garage at the specified angle; secure header beams.
- Roof Trusses: Crane in prefabricated trusses across the main span and porch areas; shear-nail per code.
4. Weatherproof Envelope & Roofing
Headline: “Sealed Tight for All Weather!”
Step-by-Step:
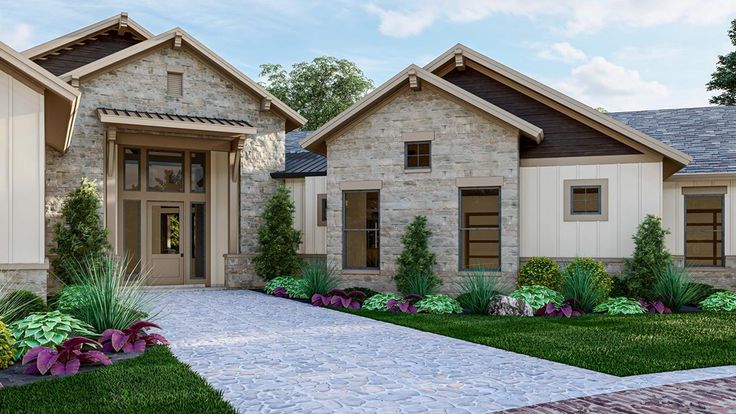
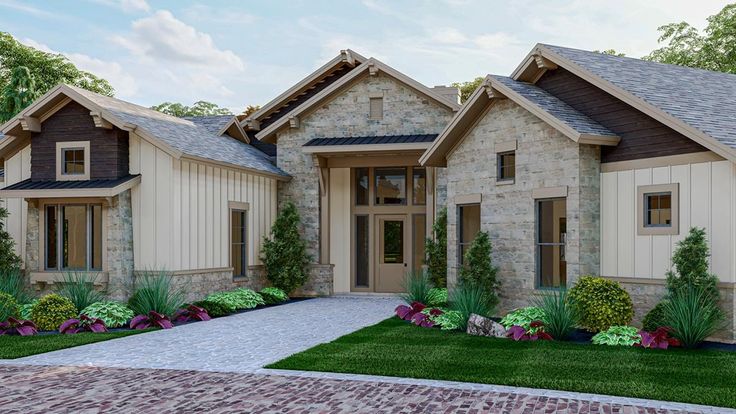
- Sheathing & House Wrap: Install ZIP panels or OSB; tape all seams and flash around window and door openings.
- Roof Deck & Underlayment: Nail plywood deck; roll on synthetic underlayment.
- Shingles & Flashing: Lay architectural shingles; flash valleys, chimneys, and porch connections.
- Trim & Gutters: Fit craftsman-style fascia, soffits, and seamless gutters.
5. MEP Rough-In & Utilities
Headline: “Systems Wired for Comfort!”
Step-by-Step:
- Plumbing Rough-In: Run PEX water lines and DWV to master baths (his/her), kitchen, laundry, and powder rooms.
- Electrical Layout: Pull THHN for lighting cans, receptacles, and dedicated circuits for the kitchen island.
- HVAC Ductwork: Hang flex ducts for multi-zone conditioning; position furnace and AC condensers.
- Low-Voltage Wiring: Prewire security, audio, and smart-home controls in the foyer and outdoor living porch.

6. Interior Finishes & Millwork
Headline: “From Drywall to Designer Details!”
Step-by-Step:
- Insulation & Drywall: Spray-foam external walls; hang, tape, and finish gypsum board throughout.
- Trim & Doors: Install craftsman baseboards, door casings, interior doors, and built-in shelving in the study.
- Cabinetry & Countertops: Fit kitchen cabinets, dual master-suite closets, and mud-room lockers.
- Flooring & Paint: Lay hardwood in living areas, tile in baths; apply two-coat paint in accent colors.

7. Outdoor Living Porch & Landscaping
Headline: “Seamless Indoor-Outdoor Entertaining!”
Step-by-Step:
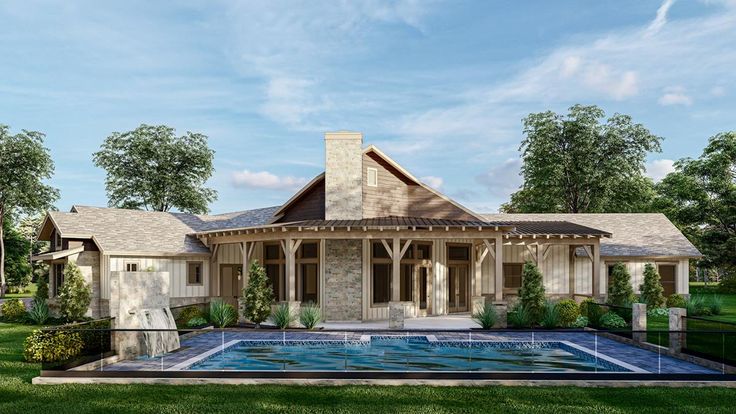
- Porch Decking: Install pressure-treated decking or pavers on the 42′×15′ covered lanai.
- Railings & Lighting: Mount rail systems and recessed porch lights.
- Hardscape & Planting: Pave walkways, plant foundation shrubs, and lay sod.
- Final Grading: Ensure proper drainage away from the foundation.
8. Garage Doors & Final Touches
Headline: “Finishing the Angled Garage Wing!”
Step-by-Step:
- Door Installation: Hang insulated, carriage-style garage doors and program openers.
- Interior Garage Trim: Add baseboards, lighting, and built-in storage.
- Hardware & Fixtures: Mount faucets, lighting fixtures, and smart switches.
- Punch-List Walk-Through: Address any deficiencies, test all systems, and secure the Certificate of Occupancy.