By: DIY Homestead & Agriculture Desk
Raising backyard chickens has become more popular than ever, and with that comes the demand for functional, predator-proof, and easy-to-maintain chicken coops. The series of plans and images you’ve shared showcase a variety of coop designs—from compact sheds to extended runs. Below is a complete news-style, step-by-step breakdown in plain English, consolidating the dimensions, diagrams, and construction steps shown.
1. Understanding the Coop Dimensions
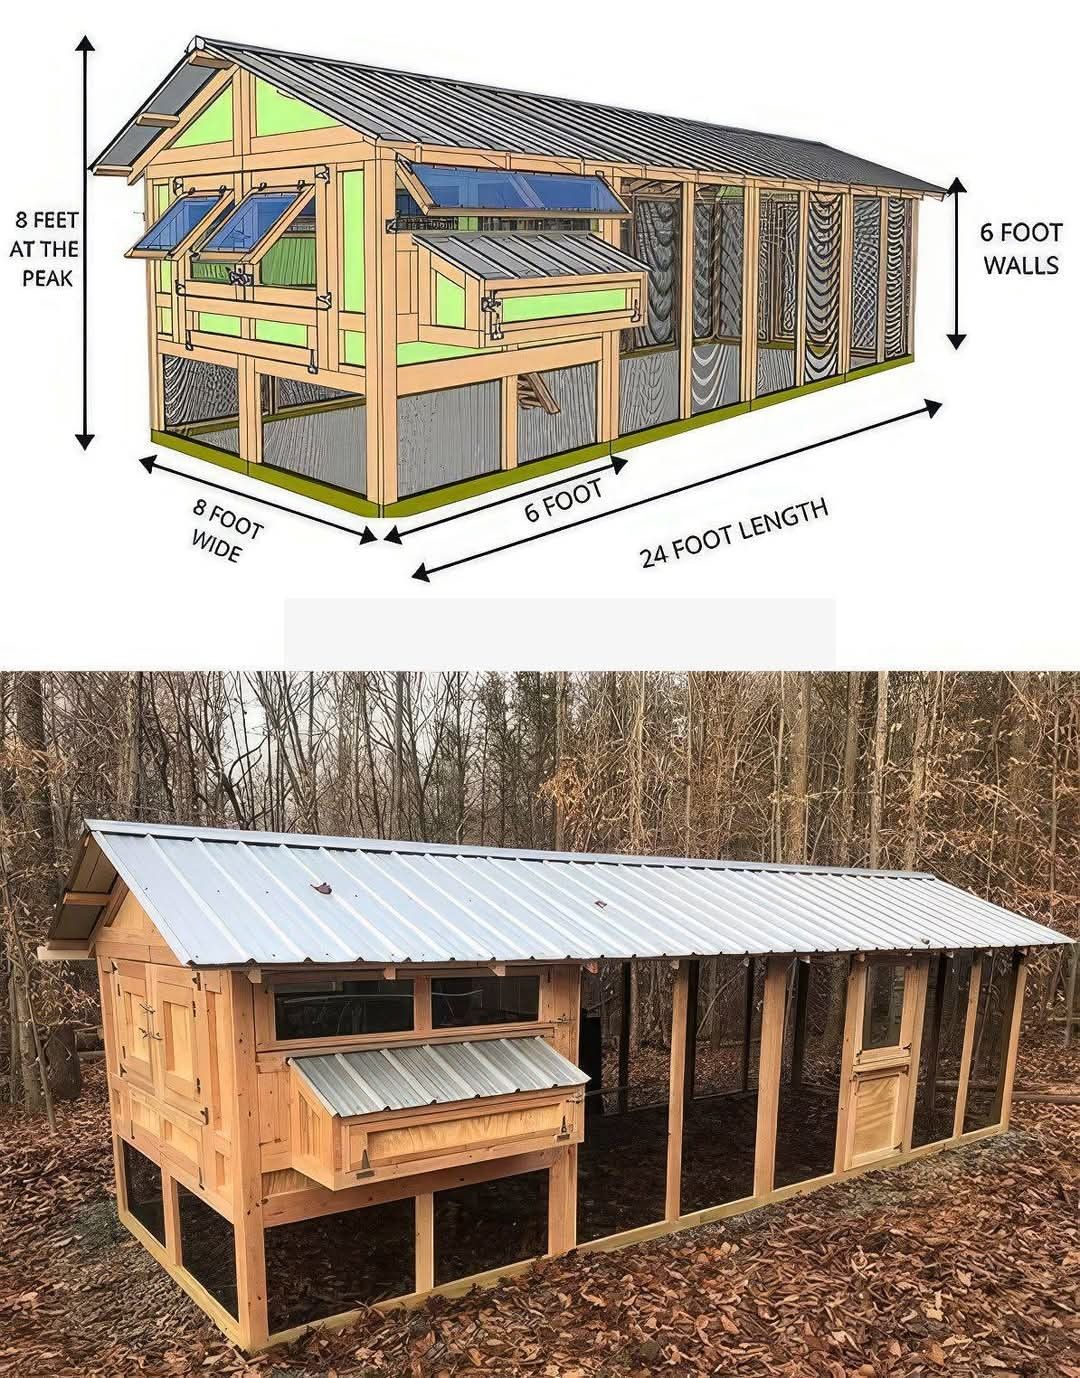
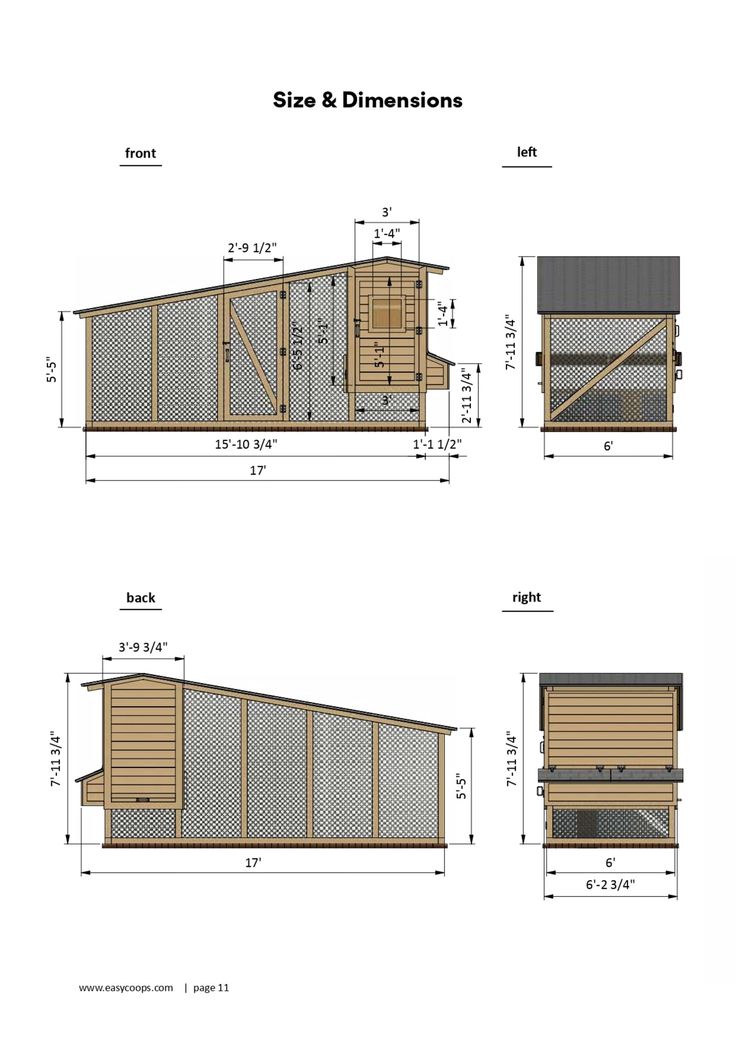
From the diagrams, we see coops ranging from:
- Small models: About 190 cm (6.2 ft) long, 113 cm (3.7 ft) tall, suitable for a small flock (3–5 hens).
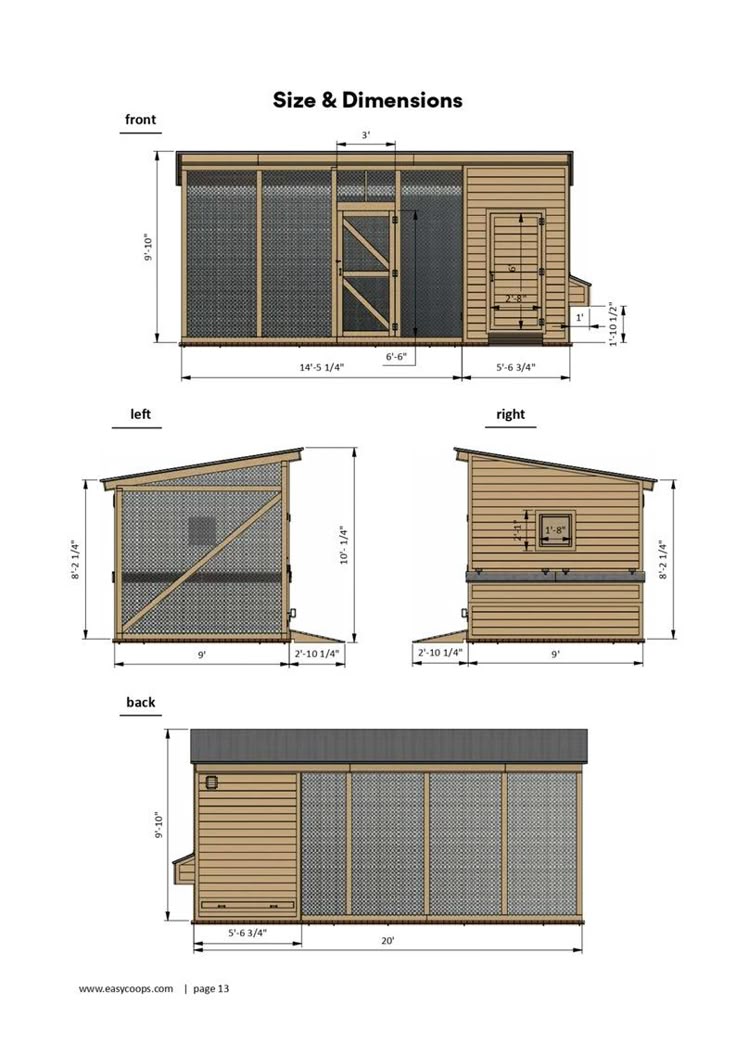
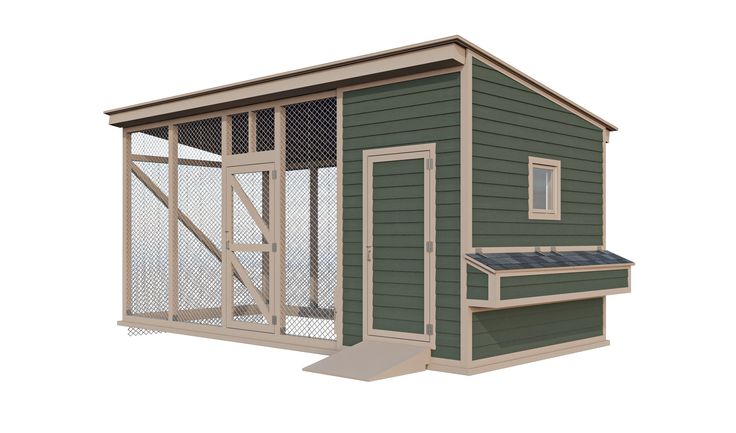
- Medium coops: Around 17–20 ft long, 6–9 ft wide, and up to 8–10 ft tall—large enough for 15–20 birds.
- Large coops with runs: 24 ft length, divided into a sheltered coop area plus a long covered run.
Key design notes:
- Height at front: 8 ft peak / 6 ft back (slanted roof for water runoff).
- Nesting boxes: Projected externally for easy egg collection.
- Runs: Wire mesh walls to protect chickens from predators while allowing ventilation.
2. Base and Frame Construction
Step 1: Build the Floor Frame
- Use pressure-treated lumber (1 ½” x 3 ½”) for durability.
- Secure using 3″ outdoor wood screws.
- Confirm corners are square with a carpenter’s square.
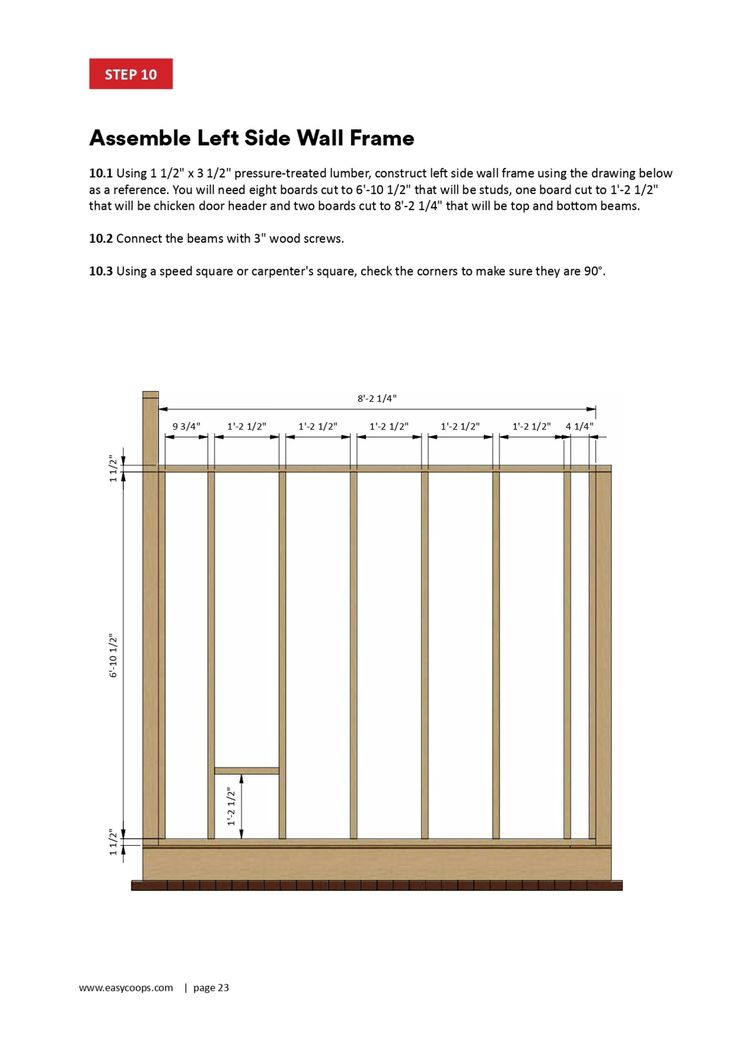
Step 2: Wall Framing
- Construct side walls using vertical studs spaced 16″ apart (or as per drawings).
- Example from the diagrams: Left wall = 8′ 2 ¼” tall, width 9′.
- Reinforce corners for strength.
Step 3: Roof Frame
- Install rafters/slanted beams for drainage.
- A corrugated metal roof or asphalt shingles are recommended.
3. Installing Panels and Mesh
- Cover the coop section with wooden siding panels.
- For the run, attach galvanized welded wire mesh (hardware cloth is stronger than chicken wire).
- Leave space for ventilation windows, covered with mesh.
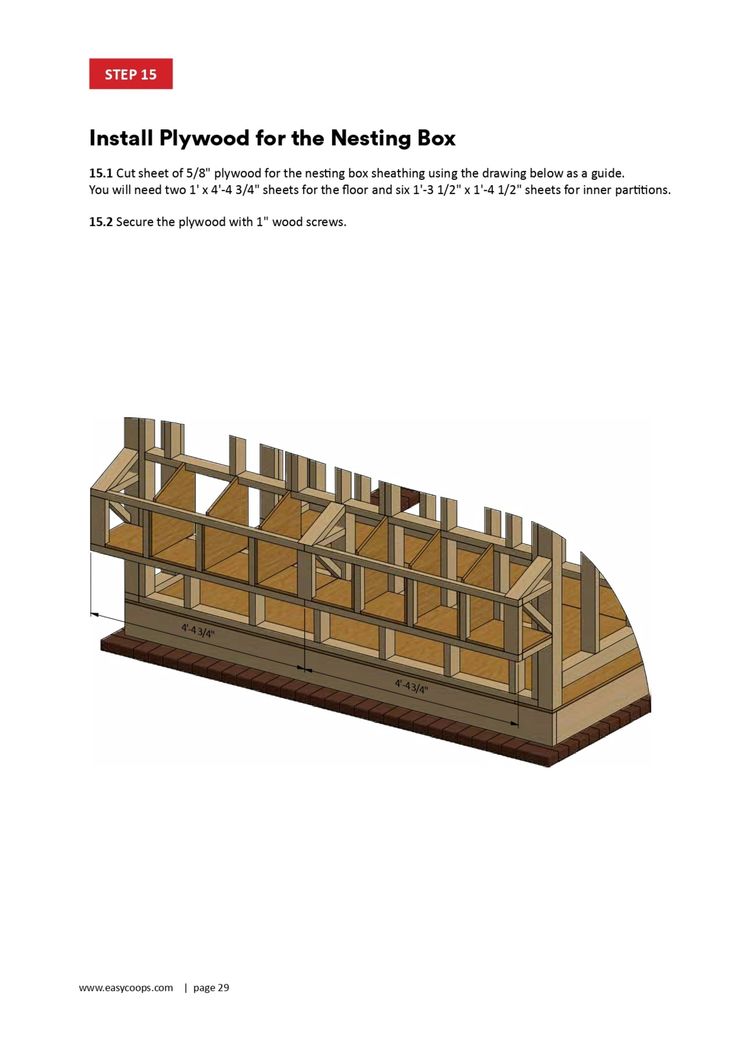
4. Nesting Boxes
From the nesting box plan (Step 15):
- Use 5/8″ plywood for partitions and floors.
- Partition boxes into sections (each box serves 3–4 hens).
- Example: A 12-hen flock needs 3–4 nesting boxes.
- Dimensions: About 12″ x 12″ per box.
Attach nesting boxes to the side with an exterior lid so eggs can be collected without entering the coop.
5. Roosting Bars and Interior Layout
- Chickens sleep on roosting bars, not in nesting boxes.
- Place wooden bars about 18–24″ above the floor.
- Provide 8–10″ of roost space per bird.
- Interior should have:
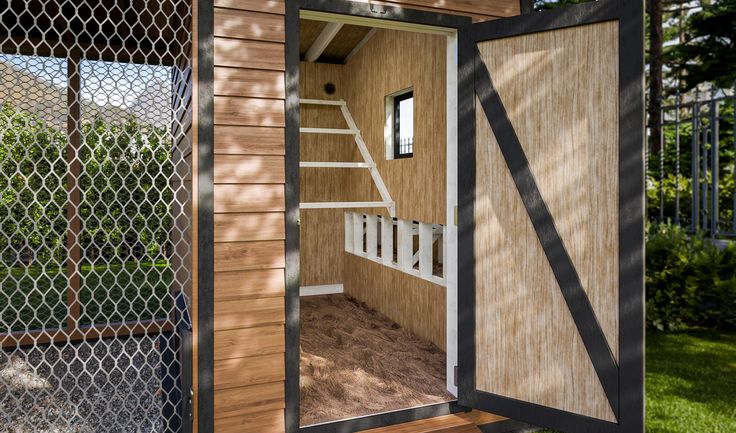
- Ramp connecting run and coop.
- Ventilation windows to prevent ammonia buildup.
- Easy-to-clean flooring (plywood base topped with litter).
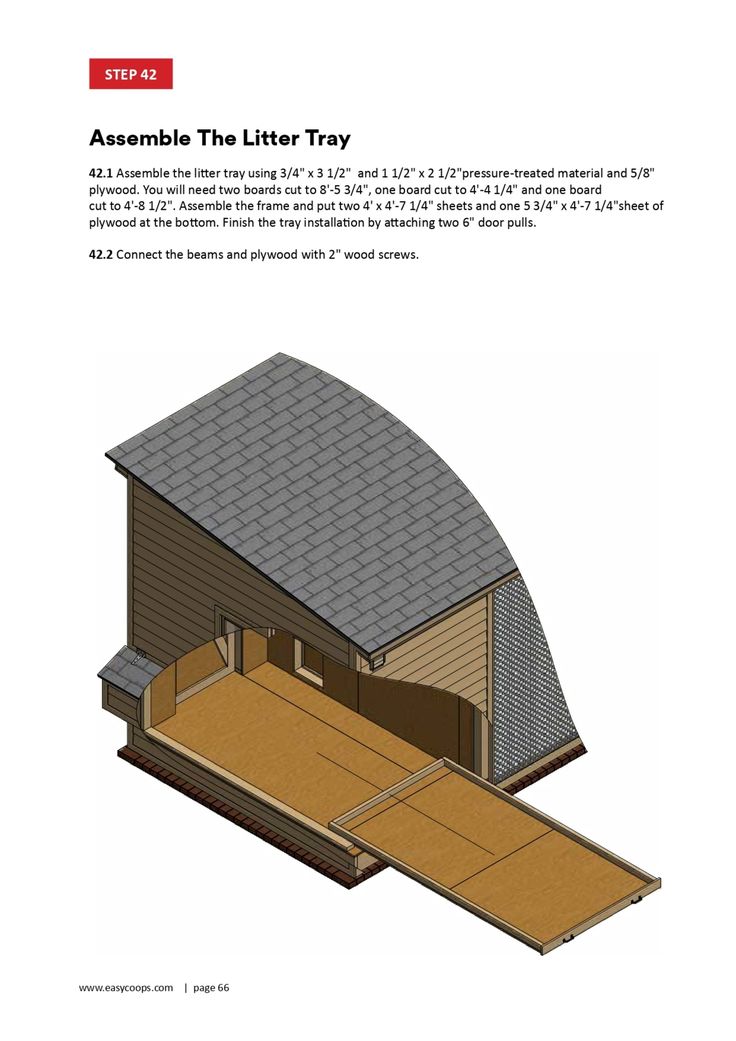
6. Litter Tray System
From the litter tray diagram (Step 42):
- Build a slide-out tray using ¾” plywood.
- Line with a removable sheet (or linoleum) for easy cleaning.
- This collects droppings and makes daily maintenance faster.
7. Doors and Access Points
- Main door: For human entry (cleaning, feeding).
- Chicken door (pop door): Small opening (~12″ x 12″) for chickens to access the run.
- Ventilation openings: Covered with wire mesh.
8. Final Touches
- Paint or stain the wood to resist weather.
- Install latches and predator-proof locks on all doors.
- Add a ramp for chicken access to elevated coops.
- Lay gravel or concrete base to prevent digging predators.
9. Why These Designs Work
- Slanted roof: Prevents water pooling.
- Wire mesh runs: Chickens get safe outdoor access.
- External nesting boxes: Convenient egg collection.
- Raised design (some models): Prevents flooding and creates shaded space beneath.
- Modular parts (walls, trays, nesting boxes): Easier construction and future expansion.
10. Step-by-Step Summary
- Prepare and square the base.
- Build wall frames (front, back, sides).
- Assemble the roof structure.
- Attach siding and wire mesh.
- Install nesting boxes and interior roosts.
- Add slide-out litter trays for cleaning.
- Secure doors, latches, and windows.
- Paint, finish, and inspect for predator safety.
Conclusion
The coop plans shown combine ease of access for humans, safety for chickens, and comfort for egg-laying. With clear measurements (17–24 ft length for large coops, 6–9 ft width, 6–8 ft height), these designs scale from small hobby setups to larger backyard farms.
In short: this is not just a chicken coop — it’s a well-engineered poultry home that keeps hens healthy, productive, and secure. 🐔