Introduction: Why This Method Matters
Modern roof construction often involves prefabricated trusses, which are fast, economical, and reliable. However, when finishing the gable ends of a roof, builders must add a specific structure called a gable ladder. This ladder frames the overhanging section of the roof beyond the gable wall. Without it, your roof might lack structural support at the eaves, resulting in poor weather protection and a less polished look.
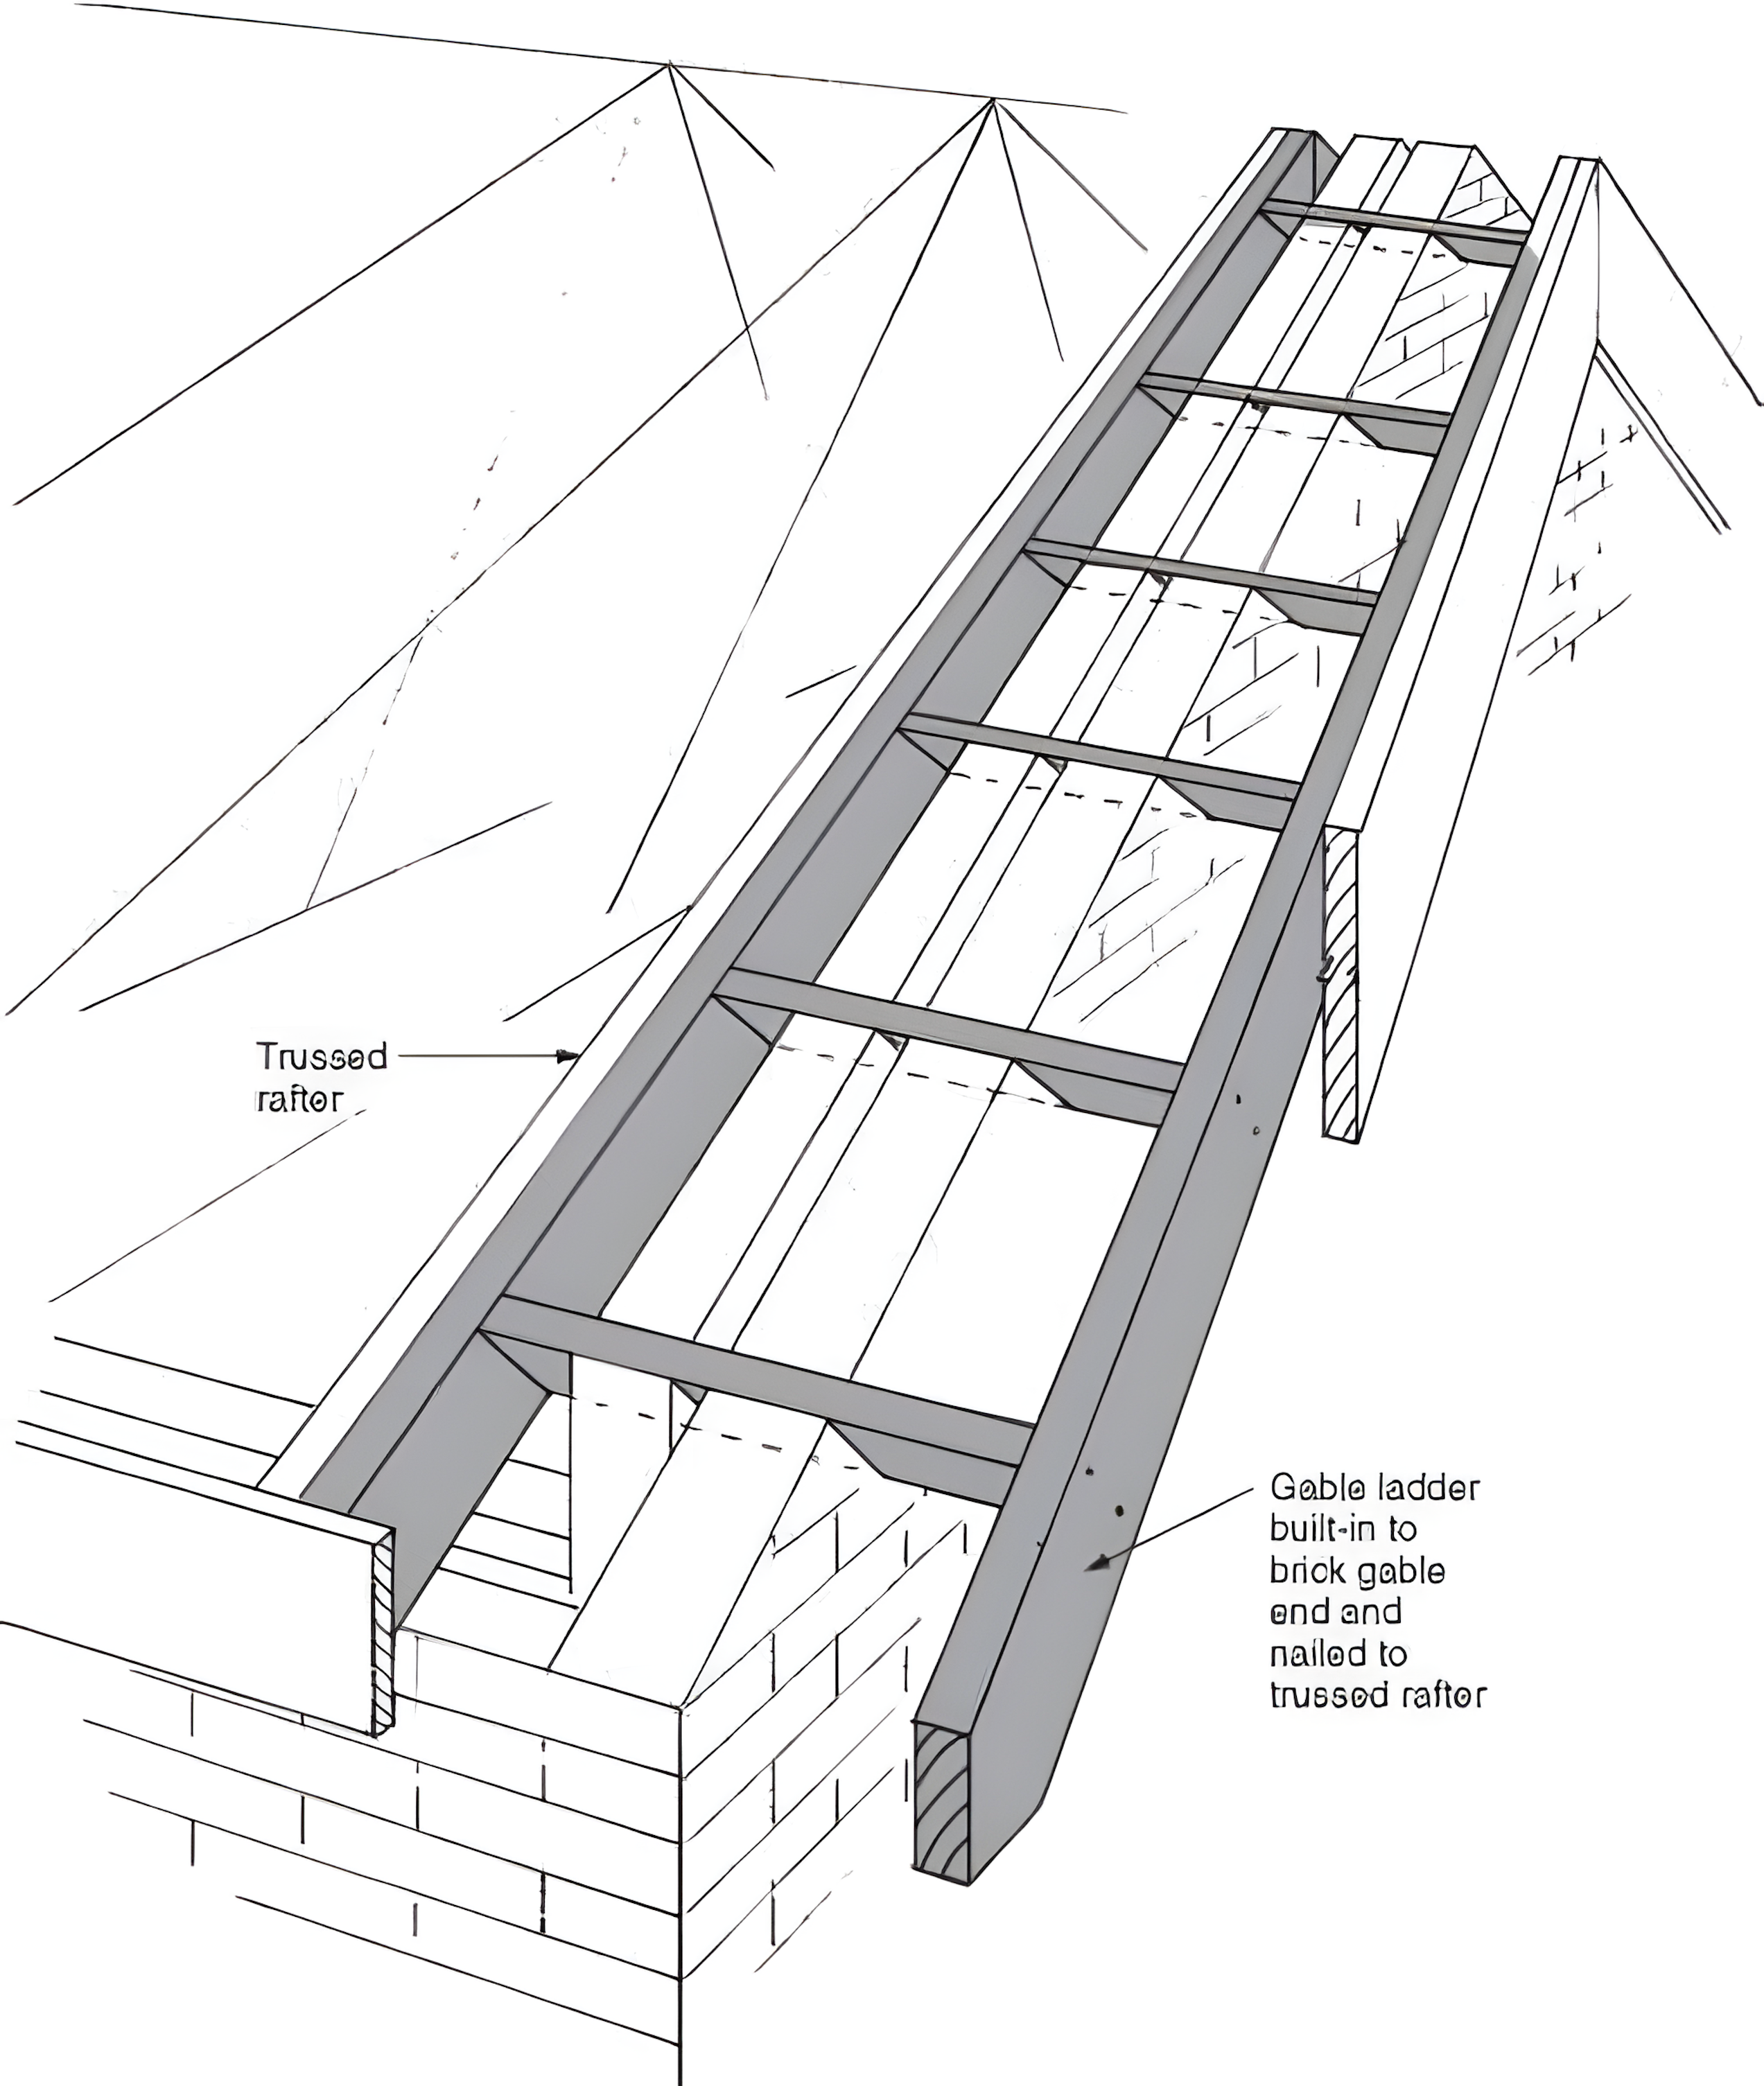
In this article, we’ll break down exactly how to construct and install a gable ladder on a trussed rafter system, as illustrated in the diagram above. This easy-to-follow guide is perfect for both professional builders and DIY enthusiasts aiming for clean and durable roofing.
What Is a Gable Ladder?
A gable ladder, also known as a barge rafter extension frame, is a ladder-like timber assembly used to extend the roof beyond the gable end wall. It creates an overhang and provides fixing points for fascia boards, soffits, and roof coverings.
Materials You’ll Need:
- Timber sections (same dimension as ceiling joists or trussed rafters)
- Nails or screws (preferably ring-shank for grip)
- Hammer or nail gun
- Level and tape measure
- Saw (hand or circular)
- Safety gear (gloves, helmet, eye protection)
Step-by-Step Construction Guide:
Step 1: Plan and Measure
Begin by measuring the projected overhang of the roof beyond the gable wall. This determines the length of your gable ladder. Typically, this ranges from 300 mm to 600 mm.
Step 2: Cut the Ladder Members
- Cut two long timbers (stringers) to the measured overhang length. These will run parallel to the roof slope.
- Cut short cross members (rungs or noggins) to span the space between the stringers. The spacing should typically match the truss centers (400 mm or 600 mm apart).
Step 3: Assemble the Ladder
Lay the stringers on a flat surface and nail or screw the noggins in place perpendicular between them. Ensure they are flush and equally spaced.
🔧 Tip: Use a square to ensure 90° angles between stringers and noggins.
Step 4: Secure to the Gable End
- Position the assembled ladder on top of the gable brick wall, as shown in the diagram.
- One stringer should be built into the wall for anchoring.
- The ladder should be nailed to the adjacent trussed rafter, which supports it structurally and integrates it into the roof system.
✅ This ensures the ladder won’t sag or twist over time.
Step 5: Check for Level and Plumb
Before final nailing, use a spirit level to check the alignment. Adjust if necessary. The outer edge of the ladder should be flush with the outer face of the brickwork.
Step 6: Final Fixing
Secure the ladder fully with nails or screws into:
- The brick gable (through stringers into masonry if possible or using wall straps)
- The trussed rafter (multiple fixing points)
Why This Works
This method anchors the gable ladder solidly in two places: the brick wall and the trussed rafter. This double fixing minimizes lateral movement and prevents wind uplift, especially in high-exposure areas. It also ensures a strong, straight, and clean edge to your roof—perfect for adding bargeboards and finishing trim.
Common Mistakes to Avoid
- Skipping structural fixing: Only nailing into the gable wall is not enough. The trussed rafter connection is crucial.
- Poor spacing of noggins: Irregular spacing can cause sheathing or fascia boards to warp.
- No level check: Misaligned ladders ruin the roof line aesthetics and can cause water pooling or runoff issues.
Maintenance Tip
Once your roof is complete, inspect the gable ladder during annual maintenance. Look for signs of movement, loose fasteners, or rot—especially if the ends are exposed.
Final Thoughts
Installing a gable ladder may seem like a minor part of roof construction, but it plays a huge role in both structural integrity and visual appeal. Done properly, this detail ensures your roof’s edge stays strong, weather-resistant, and neatly finished.